How to Make Paper Flowers for Home Decoration: Step-by-Step Guide
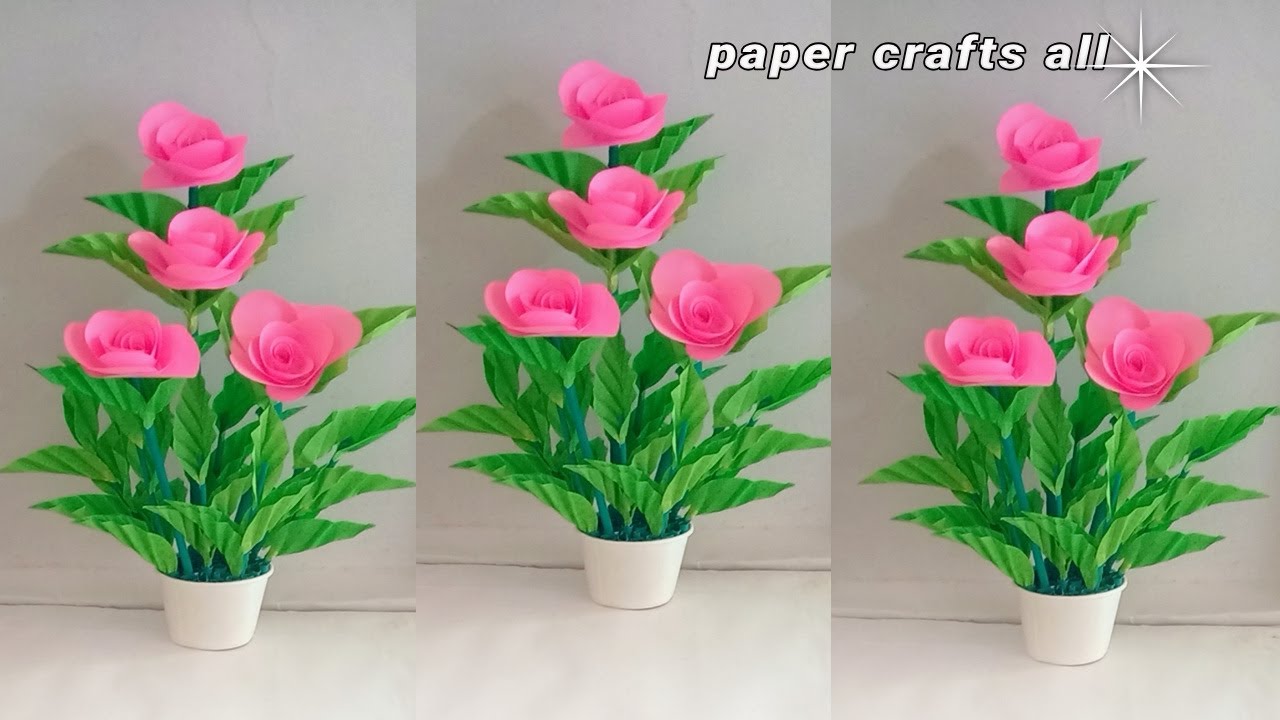
Making paper flowers is a fun and creative activity. It adds a personal touch to your home decor.
These flowers are easy to make and can brighten any room. Paper flowers are perfect for those who love crafts. They are affordable and customizable. You can use different colors, shapes, and sizes to match your home’s style. Plus, they don’t wilt, so they last forever.
Whether you’re a beginner or a seasoned crafter, making paper flowers is a rewarding hobby. In this post, we’ll guide you through the steps to create stunning paper flowers. Let’s dive in and bring a splash of color to your home!
Materials Needed
Creating paper flowers for home decoration is a delightful and creative project. To get started, you’ll need a variety of materials. This section will guide you through the essential items required for making beautiful paper flowers. Ensuring you have the right materials will make the process much easier and enjoyable.
Types Of Paper
Choosing the right paper is crucial for your paper flowers to look realistic and vibrant. Here are some popular options:
- Crepe Paper: Offers flexibility and a textured look, perfect for petals.
- Tissue Paper: Lightweight and comes in many colors, ideal for delicate flowers.
- Cardstock: Sturdy and durable, good for larger flower designs.
- Origami Paper: Pre-cut squares in various patterns, great for detailed flowers.
Tools And Supplies
Having the right tools and supplies will make crafting easier and more precise. Below is a list of essential items:
| Tool | Description |
|---|---|
| Scissors | For cutting paper into shapes and sizes. |
| Glue | To stick petals and other parts together. Use hot glue for a strong bond. |
| Wire | To create stems and give structure to the flowers. |
| Floral Tape | Wraps around wire stems to give a natural look. |
| Templates | Helps in cutting uniform shapes for petals and leaves. |
| Paint | Optional, for adding details and colors to the flowers. |
| Pliers | For bending and cutting wire with ease. |
With these materials on hand, you are ready to start crafting beautiful paper flowers for your home. Happy crafting!
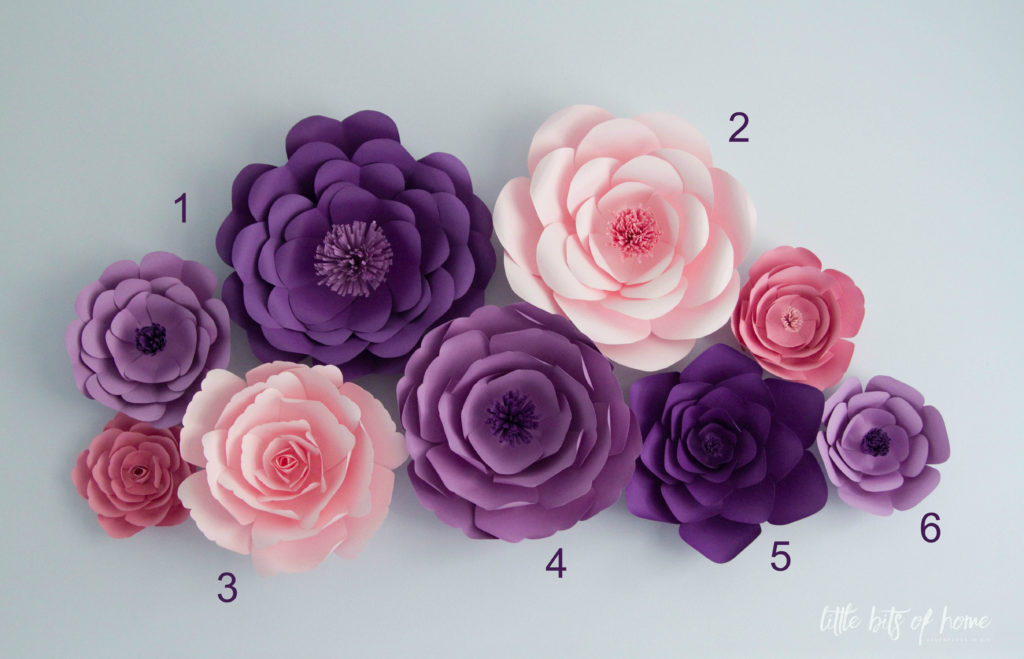
Credit: www.littlebitsofhome.com
Choosing Flower Designs
Creating paper flowers for home decoration is a fun and creative activity. The first step is to choose the right flower designs. This ensures your paper flowers look stunning and fit well with your home decor. Let’s explore some popular flower types and how to select the perfect colors for your project.
Popular Flower Types
There are many types of flowers you can make from paper. Some are simple, while others are more detailed. Here are a few popular options:
- Roses: These are elegant and classic. Roses add a touch of sophistication to any room.
- Daisies: Simple and cheerful, daisies bring a bright, happy vibe.
- Peonies: These flowers are lush and full. They are perfect for a luxurious look.
- Sunflowers: Big and bold, sunflowers make a great statement piece.
- Cherry Blossoms: Delicate and beautiful, they are perfect for a soft, romantic touch.
Color Selection
Choosing the right colors for your paper flowers is crucial. The colors should match or complement your home decor. Here are some tips:
- Match Your Decor: Choose colors that match your room’s color scheme. This helps the flowers blend in seamlessly.
- Contrast for Effect: Use contrasting colors to make your flowers stand out. This adds a pop of color to the room.
- Seasonal Colors: Use colors that reflect the current season. Pastels for spring, bright colors for summer, warm tones for fall, and cool shades for winter.
- Personal Preference: Choose colors you love. Your favorite colors will make your flowers more special to you.
Experiment with different color combinations. This will help you find the perfect look for your home.
Cutting The Petals
Creating beautiful paper flowers begins with cutting the petals. This step is crucial for achieving realistic and stunning results. Whether you’re making roses, tulips, or daisies, the precision and technique you use in cutting the petals will determine the quality of your final product. Let’s dive into the essentials of cutting petals for paper flowers.
Templates And Patterns
To start, you’ll need templates and patterns. These will guide your cutting and ensure consistency. You can find many free templates online, or you can create your own. Use a pencil to trace the patterns onto your paper.
- Download or draw petal templates.
- Print or trace them onto your chosen paper.
- Ensure each petal is the same size for uniformity.
Cutting Techniques
Cutting techniques are vital for clean edges and realistic petals. Here are some methods:
- Use sharp scissors to avoid jagged edges.
- For intricate designs, use a craft knife and cutting mat.
- Cut slowly and steadily to maintain control.
- Consider using a paper punch for uniform shapes.
By following these steps, you’ll achieve professional-looking paper flowers. Remember, practice makes perfect. So, keep honing your skills and experimenting with different patterns and cutting techniques.
Shaping The Petals
Shaping the petals is a vital step in making paper flowers. It gives your flowers a realistic and beautiful look. Here, we discuss two key techniques: curling and folding, and adding texture. These methods will help you create stunning paper flowers for home decoration.
Curling And Folding
Curling and folding your paper petals adds depth and dimension. Use a round tool like a pencil to curl the edges. Gently roll the petal edges around the pencil. This creates a natural curve.
Folding is another effective method. Fold the petal down the middle to create a crease. This gives your petals a more defined shape. You can also make small pleats for added detail.
Adding Texture
Adding texture makes your paper flowers look more lifelike. Use the edge of scissors to scrape the petals gently. This creates fine lines and grooves. These lines mimic the natural veins of real petals.
Another way to add texture is by using a ball tool. Press the tool into the petals to create small indentations. This technique adds a three-dimensional effect. Your paper flowers will look more realistic.
Assembling The Flower
Creating paper flowers is a delightful craft. The final step is assembling the flower. This part brings all your hard work together. Let’s dive into layering petals and securing with glue.
Layering Petals
First, gather all your cut petals. Start with the smallest petals. Place them in the center of your workspace. Layer them one by one. Ensure each petal overlaps slightly. This gives a natural look. Continue adding larger petals around the center. Adjust as needed. Make sure the flower looks balanced and full.
Securing With Glue
Once satisfied with the arrangement, it’s time to secure. Use a hot glue gun or craft glue. Add a small dot of glue at the base of each petal. Press gently to adhere. Hold for a few seconds until secure. Continue this process for all petals. Make sure each layer is well-attached. This ensures the flower holds its shape. Allow the glue to dry completely. Admire your beautiful paper flower!
Creating The Stem
Creating the stem is a crucial step in making paper flowers. A sturdy stem supports your flower and gives it a realistic look. You can use wire and floral tape to create a strong stem.
Using Wire
First, choose a flexible wire for your stem. Cut the wire to your desired length. Ensure the wire is long enough to support the flower head. You can use pliers to cut the wire. Bend one end of the wire to create a small loop. This loop helps attach the flower head securely.
Wrapping With Floral Tape
Next, use floral tape to wrap the wire. Start at the top near the loop. Hold the tape at an angle and stretch it slightly. This makes it sticky and easier to wrap. Wrap the tape tightly around the wire, moving downward. Ensure there are no gaps. Cover the entire length of the wire. Floral tape comes in various colors. Choose a color that matches your flower. This enhances the natural look of your paper flower stem.
By following these steps, you create a strong and realistic stem for your paper flowers. Now your handmade flowers are ready to brighten up any space in your home.
Adding Leaves And Details
Adding leaves and details to your paper flowers can make them more realistic. Leaves provide a natural look and balance to the overall design. With a few simple steps, you can create stunning paper leaves and attach them to your stems.
Cutting And Shaping Leaves
To create leaves for your paper flowers, start by choosing the right paper. Green craft paper works best. Follow these steps for perfect leaves:
- Draw leaf shapes on the paper. Use a pencil.
- Cut out the leaf shapes with scissors. Be precise.
- Shape the leaves by folding them in half lengthwise. This creates a vein.
- Use your fingers to gently curl the edges. This adds a natural look.
Repeat these steps for each leaf you need. Vary the sizes for a more organic appearance.
Attaching To Stem
Once your leaves are ready, it is time to attach them to the stems. Follow these simple steps:
- Choose the right spot on the stem. Near the flower works best.
- Apply a small dab of glue to the base of the leaf. Use a hot glue gun for a strong bond.
- Press the leaf onto the stem. Hold it in place for a few seconds until the glue sets.
- Repeat for each leaf. Arrange them in a natural pattern.
For added detail, consider adding small veins to the leaves with a fine-tip marker. This can enhance their realistic appearance.
With these steps, your paper flowers will look more lifelike and beautiful. Happy crafting!
Arranging Your Flowers
You’ve crafted beautiful paper flowers. Now it’s time to arrange them. Proper arrangement can enhance your home decor. Let’s explore some creative ways to display your paper flowers.
Vase Arrangements
A vase can bring elegance to your paper flowers. Choose a vase that complements your flowers. You can use clear glass, ceramic, or even recycled bottles.
- Clear Glass Vase: Perfect for showcasing vibrant colors.
- Ceramic Vase: Adds a touch of rustic charm.
- Recycled Bottles: Eco-friendly and stylish.
Arrange your flowers with varying heights. This creates visual interest. Use floral foam to keep them in place. Or, fill the vase with pebbles for stability.
| Type of Vase | Best for |
|---|---|
| Clear Glass | Vibrant Colors |
| Ceramic | Rustic Look |
| Recycled Bottles | Eco-friendly Decor |
Wall Decorations
Paper flowers are excellent for wall decorations. They add a splash of color and texture. You can create a floral wall art or a garland.
- Floral Wall Art: Arrange flowers in a frame. Hang it on the wall.
- Garland: String flowers together. Drape them across a wall or window.
Use double-sided tape or glue dots to secure flowers. This keeps your wall clean and undamaged. Arrange flowers in clusters or patterns. This adds depth and interest.
Experiment with different colors and sizes. The goal is to create a unique and beautiful display. Your wall decor will surely impress your guests.
Tips And Tricks
Creating paper flowers for home decoration can be a fun and rewarding activity. Here are some tips and tricks to make your flowers look stunning and last longer. By following these simple guidelines, you can create beautiful paper flowers with ease.
Choosing The Right Paper
Selecting the right paper is crucial for making realistic and durable paper flowers. Here are some suggestions:
- Crepe Paper: This paper is stretchy and easy to shape. It gives a realistic texture to the flowers.
- Tissue Paper: Thin and delicate, tissue paper is great for creating soft petals.
- Cardstock: For more structured flowers, use cardstock. It holds its shape well.
- Origami Paper: This is perfect for intricate designs and detailed flowers.
Make sure to choose colors that match your home decor. You can also mix different types of paper for a unique look.
Maintaining Your Flowers
To keep your paper flowers looking fresh and beautiful, follow these maintenance tips:
- Avoid Direct Sunlight: Exposure to sunlight can fade the colors. Place them away from windows.
- Dust Regularly: Use a soft brush or a hairdryer on a cool setting to remove dust.
- Handle with Care: Paper flowers are delicate. Handle them gently to prevent tearing.
- Store Properly: If you need to store them, use a box with tissue paper to keep them safe.
Following these simple steps can keep your paper flowers looking beautiful for a long time.
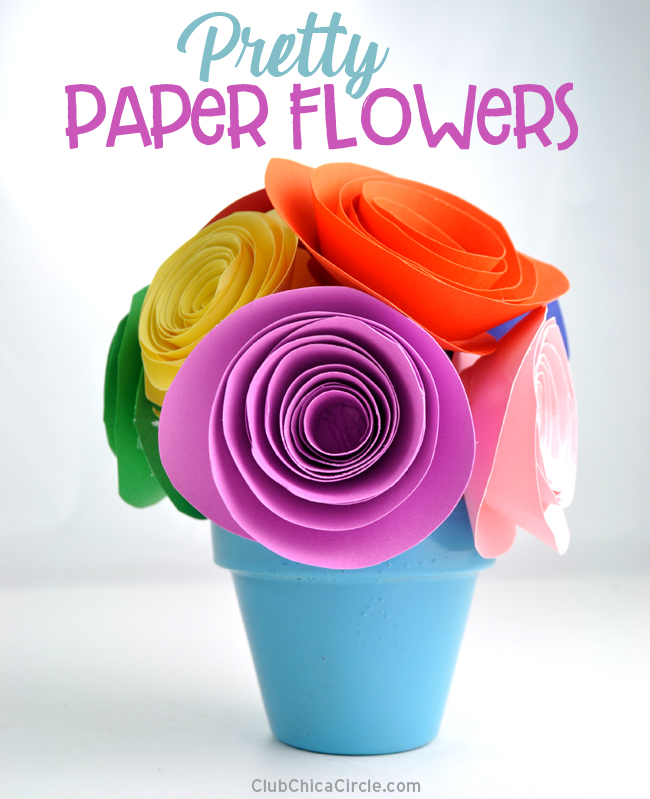
Credit: club.chicacircle.com

Credit: www.youtube.com
Conclusion
Creating paper flowers for home decoration is fun and rewarding. These handmade decorations add a personal touch to any space. You can customize colors and styles to match your home decor. Plus, crafting paper flowers is budget-friendly. Gather your materials, follow the steps, and let your creativity shine.
Enjoy the beauty and charm these paper flowers bring to your home. Happy crafting!
