How to Make Decorative Signs for Home: Easy DIY Ideas
Decorative signs can add charm to any home. They are fun, creative, and easy to make.
Are you looking to add a personal touch to your home decor? Making your own decorative signs is a great way to achieve this. Whether you are aiming for rustic, modern, or whimsical, creating signs can transform your space. You don’t need to be a professional artist or crafter to get started.
With simple materials and a bit of creativity, you can make beautiful signs that reflect your style. This guide will walk you through the steps, from gathering materials to displaying your finished pieces. Get ready to add some charm and personality to your home with DIY decorative signs!

Credit: www.amazon.com
Introduction To Diy Home Signs
Decorative signs add a personal touch to any home. They can display inspirational quotes, family names, or seasonal greetings. DIY home signs are simple to make and allow for creativity. You can tailor them to match your home’s style and personality. This guide will help you get started on creating your own decorative signs.
Benefits Of Decorative Signs
Decorative signs enhance your home’s ambiance. They create a welcoming atmosphere. Guests feel more at home when they see personalized signs. These signs also reflect your taste and style. Creating your own signs saves money. You can also make them as gifts for friends and family.
Materials Needed
To make decorative signs, gather these materials:
- Wooden boards or canvas
- Acrylic or chalk paint
- Paintbrushes of various sizes
- Stencils for letters and designs
- Sandpaper for smoothing surfaces
- Painters tape for clean lines
- Pencil and ruler for measurements
- Sealant to protect your finished sign
With these materials, you can start your DIY project. Enjoy the process and create something special for your home!
Choosing Your Design
Designing your decorative signs is a fun and creative process. It allows you to express your personality and style. You can choose from various designs and themes to match your home decor. In this section, we will explore two popular design choices for home signs: Inspirational Quotes and Seasonal Themes.
Inspirational Quotes
Inspirational quotes add a positive vibe to your home. They can motivate and uplift your spirits. Choose quotes that resonate with you and your family. Here are some tips for selecting the perfect quote:
- Pick short and meaningful quotes.
- Ensure the font is easy to read.
- Match the text color with your home decor.
Here are some examples of popular quotes:
| Quote | Meaning |
|---|---|
| “Home Sweet Home” | Emphasizes the comfort of home. |
| “Live, Laugh, Love” | Encourages a happy and fulfilling life. |
| “Dream Big” | Inspires ambition and courage. |
Seasonal Themes
Seasonal themes bring a festive touch to your home. They reflect the beauty of different times of the year. Here are some ideas for each season:
- Spring: Flowers, butterflies, and pastel colors.
- Summer: Beach scenes, sun, and vibrant hues.
- Autumn: Leaves, pumpkins, and warm tones.
- Winter: Snowflakes, reindeer, and cool shades.
Changing your signs with the seasons keeps your decor fresh and exciting. It also allows you to celebrate each season’s unique charm.
Preparing Your Workspace
Creating decorative signs for your home can be a fun and rewarding project. Before you start, it’s important to prepare your workspace properly. A well-organized and safe area ensures that your project goes smoothly and efficiently.
Gathering Tools
To begin, gather all the necessary tools. Having everything you need within reach will make the process much easier. Here’s a list of essential tools:
- Measuring tape or ruler
- Pencil and eraser
- Paintbrushes and paint
- Sandpaper
- Wood glue
- Hammer and nails
- Safety goggles and gloves
Make sure your tools are in good condition. Dull or broken tools can make the task harder and less enjoyable.
Setting Up A Safe Area
Safety should be your top priority. Create a safe workspace by following these steps:
- Choose a well-ventilated area. This helps reduce fumes from paint and glue.
- Cover your work surface with a protective layer. Use old newspapers or a plastic sheet.
- Ensure proper lighting. Good lighting helps you see details better.
- Keep a first aid kit nearby. Accidents can happen, so be prepared.
Keep children and pets away from your workspace. This prevents accidents and distractions. Always wear your safety goggles and gloves while working. They protect your eyes and hands from injuries.
With a well-prepared workspace, you are ready to start creating beautiful decorative signs for your home. Enjoy the process and let your creativity shine!
Wooden Sign Projects
Creating wooden signs for your home can be a fun project. These signs can add a personal touch to your decor. They are simple to make and can fit any style. You can use different types of wood and various designs. Below are some easy projects to get you started.
Basic Wooden Sign
A basic wooden sign is a great start for beginners. You will need a piece of wood, paint, and a stencil. First, sand the wood to smooth any rough edges. Next, apply a base coat of paint. Let it dry completely. Then, place the stencil on the wood and paint over it. Remove the stencil carefully. Your basic wooden sign is ready to display!
Rustic Pallet Sign
A rustic pallet sign adds a vintage feel to your home. Start by finding an old wooden pallet. Clean it thoroughly to remove dirt. Sand the surface for a smoother finish. Paint the pallet with a distressed look. You can use white or any light color. Let the paint dry. Then, use a stencil or freehand to add your desired text or design. This rustic sign will give your home a cozy, country vibe.
Chalkboard Signs
Chalkboard signs add a rustic and charming touch to any home decor. They are versatile and easy to customize. You can use them for various purposes, such as welcoming guests, displaying menus, or inspirational quotes. Let’s explore how to create and design your own chalkboard signs.
Creating A Chalkboard Surface
To start, you will need a few materials:
- Wooden board or canvas
- Chalkboard paint
- Paintbrush or roller
- Chalk or chalk markers
Follow these steps to create your chalkboard surface:
- Clean and sand the wooden board to remove any rough edges.
- Apply a coat of chalkboard paint using a brush or roller.
- Allow the paint to dry completely. This usually takes a few hours.
- Apply a second coat of paint for a smoother finish.
- Wait for the paint to dry completely before using.
Now, your chalkboard surface is ready for designing.
Design Ideas For Chalkboards
Once your surface is ready, you can explore various design ideas:
- Welcome Signs: Greet your guests with a personalized welcome message.
- Menu Boards: Display the daily menu or special dishes in your kitchen or dining area.
- Inspirational Quotes: Write uplifting quotes to inspire everyone who sees it.
- Event Signage: Create signs for parties, weddings, or other events.
Use different fonts and styles to make your chalkboard signs unique. You can also add simple drawings or borders to enhance the design.
Canvas And Fabric Signs
Creating decorative signs for your home can be both fun and rewarding. Canvas and fabric signs offer a versatile and stylish way to personalize your space. You can use different techniques to create unique and eye-catching designs. Let’s explore two popular methods: painting on canvas and fabric lettering techniques.
Painting On Canvas
Painting on canvas allows for endless creativity. You can choose from a variety of paints like acrylic or fabric paint. Start by selecting a canvas size that fits your space. Use a pencil to sketch your design lightly on the canvas.
Next, apply a base coat of paint to create a background. Let it dry completely. Then, use finer brushes to add details and colors to your design. For a bold look, outline your design with a black or dark-colored paint. Allow the paint to dry and then seal your artwork with a clear varnish to protect it.
Fabric Lettering Techniques
Fabric lettering adds a personal touch to your signs. You can use various materials like felt, cotton, or burlap. Start by cutting out letters from your chosen fabric. You can use stencils to ensure uniformity. Arrange the letters on your base fabric to spell out words or phrases.
Use fabric glue or a sewing machine to attach the letters to the base fabric. For a more detailed look, you can add embellishments like buttons, ribbons, or beads. This will give your sign a unique and personalized feel. Finally, frame your fabric sign or hang it with decorative clips.
By using these techniques, you can create beautiful and meaningful decorative signs for your home. Enjoy the process and let your creativity shine!
Reusing And Upcycling Materials
Reusing and upcycling materials for decorative signs is not only eco-friendly but also adds a unique touch to your home decor. You can turn old and unused items into beautiful signs that reflect your personality and style. Let’s explore how to use old frames and repurposed wood to create stunning decorative signs.
Old Frames
Old frames are perfect for making decorative signs. You can find them at thrift stores or in your attic. First, clean the frame to remove dust and dirt. Then, remove the glass and backing. Paint the frame in a color that matches your decor. You can also sand it for a rustic look.
Next, cut a piece of cardboard or wood to fit the frame. Paint it with chalkboard paint or cover it with fabric. Write your message with chalk or use stencils for a professional look. Hang your new sign on the wall or place it on a shelf.
Repurposed Wood
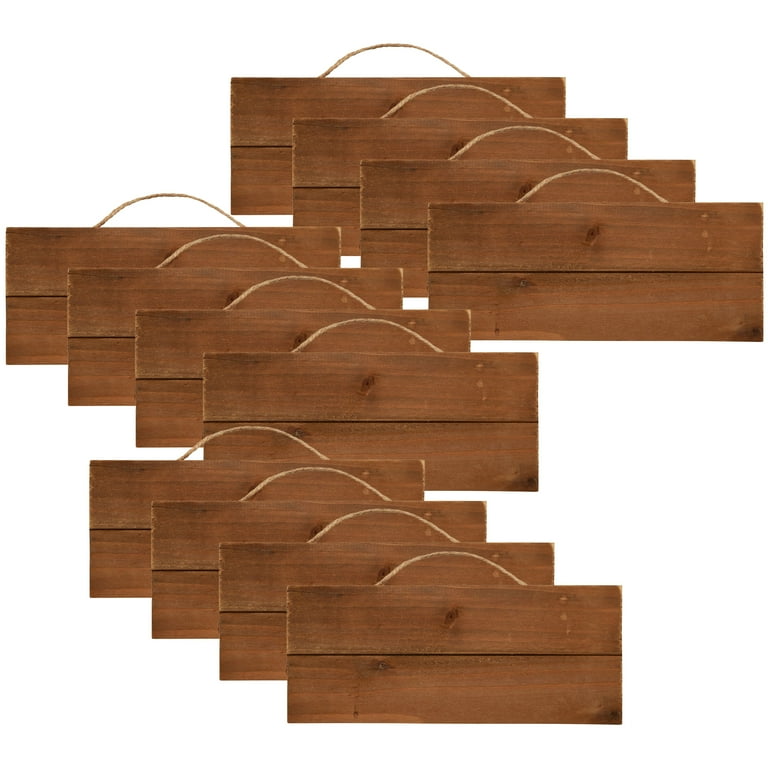
Repurposed wood can be turned into charming signs. Look for old pallets, barn wood, or scrap lumber. Clean the wood and sand it to remove rough edges. You can stain or paint the wood to match your decor.
Use stencils or freehand your design with acrylic paint. You can write quotes, family names, or seasonal greetings. Attach hooks or nails to the back for easy hanging. Repurposed wood signs add warmth and character to any room.

Credit: www.walmart.com
Finishing Touches
After crafting your beautiful decorative signs for your home, it’s time to add the finishing touches. These final steps ensure your signs look professional and last longer. Let’s dive into the essential details to perfect your DIY project.
Sealing And Protecting
Sealing your sign is crucial. It protects the paint and wood. Use a clear polyurethane sealer or a clear acrylic spray. These products prevent fading and damage.
Here’s a simple guide:
- Choose your sealer based on the sign’s location (indoor or outdoor).
- Apply a thin, even coat using a brush or spray can.
- Let it dry completely (usually about 24 hours).
- Apply a second coat for extra protection.
Remember, always work in a well-ventilated area.
Hanging And Displaying
Displaying your sign correctly enhances its beauty. Consider the following methods for hanging:
- Sawtooth hangers: Easy to attach, perfect for small to medium signs.
- Picture wire: Ideal for larger signs. Attach D-rings on the back and string wire between them.
- Command strips: Great for lightweight signs and avoids wall damage.
Follow these steps for the best results:
| Method | Best For | Instructions |
|---|---|---|
| Sawtooth Hangers | Small to Medium Signs | Center the hanger on the back, nail it in, and hang on a nail or hook. |
| Picture Wire | Large Signs | Screw D-rings onto the back, string wire between them, and hang on strong hooks. |
| Command Strips | Lightweight Signs | Press strips onto the back, then stick the sign to the wall. |
Ensure your sign is level and secure. A well-displayed sign adds charm and character to your home.
Inspiration And Resources
Creating decorative signs for your home can be a fun and rewarding project. With the right inspiration and resources, you can make beautiful and unique signs. Here are some places to find ideas and support.
Online Tutorials
There are many websites and platforms that offer step-by-step tutorials for making decorative signs. Here are a few popular ones:
- YouTube: Search for “DIY decorative signs” to find countless video tutorials.
- Pinterest: Browse through boards dedicated to home decor and DIY projects.
- Craft Blogs: Many bloggers share detailed guides and templates.
These resources can provide you with techniques and ideas to get started. Watching videos can be especially helpful for visual learners.
Crafting Communities
Joining a community of crafters can provide support and inspiration. Here are some ways to connect with other enthusiasts:
- Facebook Groups: Search for groups focused on DIY crafts and home decor.
- Reddit: Join subreddits like r/DIY or r/Crafts to share your projects and get feedback.
- Local Workshops: Check local craft stores for classes and meet-ups.
Being part of a crafting community can also help you stay motivated. You can share your progress and learn from others’ experiences.
With these resources, you’ll have plenty of ideas and support to create stunning decorative signs for your home.

Credit: www.amazon.com
Conclusion
Creating decorative signs for your home can be fun and easy. You only need simple materials and a bit of creativity. Personalize each sign to reflect your style. Enjoy the process and the results will be rewarding. Handmade signs add charm and warmth to any space.
Try different designs and techniques to keep things fresh. Your home will feel more inviting with these unique touches. Happy crafting!
