How to Make Decorative Flower Pots at Home: Easy DIY Guide
Want to add a personal touch to your home decor? Making decorative flower pots at home is a fun and creative way to enhance your living space.
You don’t need to be an expert or spend a lot of money. With simple materials and a bit of imagination, you can create beautiful, unique flower pots that reflect your style. Decorative flower pots can breathe life into any room.
They are perfect for showcasing your favorite plants and adding a splash of color. This guide will show you how to make your own decorative flower pots. Whether you prefer a rustic look or something more modern, you’ll find inspiration and practical tips here. Let’s get started on this enjoyable and rewarding project!
Materials Needed
Creating decorative flower pots at home is a fun and rewarding activity. The first step is gathering the necessary materials. This section will guide you through both essential supplies and optional add-ons to enhance your project.
Essential Supplies
To start, you need a few basic items. These include plain flower pots, which can be made of terracotta, plastic, or ceramic. You will also need paint or markers to decorate your pots. A set of brushes is essential for applying paint evenly.
Next, gather some sealant to protect your designs. This ensures your work lasts longer. You will also need a drop cloth or newspaper to keep your workspace clean. Don’t forget to have some water and a cloth nearby to clean up any spills.
Optional Add-ons
Consider adding some embellishments to make your flower pots unique. Glitter can add a sparkly touch to your designs. Stickers and decals are also great for adding patterns and fun elements. You might want to use stencils for more intricate designs.
For a textured look, try using fabric or lace. Glue these materials onto your pots for a unique appearance. Small beads or stones can be glued on to add dimension and color.
Choosing The Right Pot
Choosing the right pot is the first step to making beautiful flower pots at home. The pot you select will affect your plant’s growth and the overall look of your décor. Let’s explore some key factors to consider.
Types Of Pots
Different types of pots offer various benefits. Clay pots provide a natural, earthy look. They are porous, allowing air and moisture to pass through. This helps keep the soil healthy. Plastic pots are lightweight and come in many colors and shapes. They retain moisture longer, making them ideal for plants that need more water. Ceramic pots are stylish and durable. They often come with intricate designs, adding a touch of elegance to your home.
Size Considerations
The size of the pot matters for both the plant’s health and the aesthetics. Small pots are perfect for herbs and small flowers. They take up less space and are easy to move. Medium-sized pots are great for larger flowers and small shrubs. They provide enough room for the roots to grow. Large pots are ideal for big plants and trees. They can become the focal point in a room or garden. Ensure the pot size matches the plant’s needs to allow proper root growth and support.
Preparing The Pot
Creating decorative flower pots at home can be a fun and rewarding project. To ensure your pots look their best, it’s important to properly prepare them. This process involves cleaning the surface and priming the pot. By following these steps, you can achieve a professional and long-lasting finish.
Cleaning The Surface
Before decorating your flower pot, ensure it is clean. Dirt and dust can prevent paint from sticking. Use a mild soap and water to scrub the pot. Rinse thoroughly and let it dry completely.
If your pot is made of terracotta or clay, you might notice white residue. This is salt buildup. Remove it using a mixture of equal parts vinegar and water. Soak a cloth in the mixture and wipe the pot. Rinse and let it dry.
Priming The Pot
Priming the pot is an essential step. It helps the paint adhere better and last longer. Use a primer suitable for the material of your pot. For terracotta or clay pots, use a water-based acrylic primer.
Apply the primer evenly with a brush. Let the first coat dry completely. Apply a second coat if needed. Make sure the pot is fully dry before moving to the next step.
Below is a simple table to help you choose the right primer for different pot materials:
| Pot Material | Recommended Primer |
|---|---|
| Terracotta/Clay | Water-based Acrylic Primer |
| Plastic | Plastic Primer |
| Metal | Rust-proof Metal Primer |
Painting Techniques
Painting your flower pots is a fun way to add personality to your home. This section will cover various painting techniques. You can start with simple methods and work your way to more complex designs. Each technique has its own charm. Follow along to discover how to make your flower pots stand out.
Basic Painting
Start with basic painting techniques to give your pots a fresh look. First, clean your pots with soap and water. Make sure they are dry before painting. Choose a base color that matches your style. Acrylic paint works well for this task. Use a wide brush to cover the entire surface evenly.
Let the base coat dry completely. You can then add a second layer for a more vibrant color. For a smooth finish, use sandpaper between coats. This will remove any bumps and give a polished look. Basic painting is easy and quick. It’s a great way to start your decorative project.
Advanced Designs
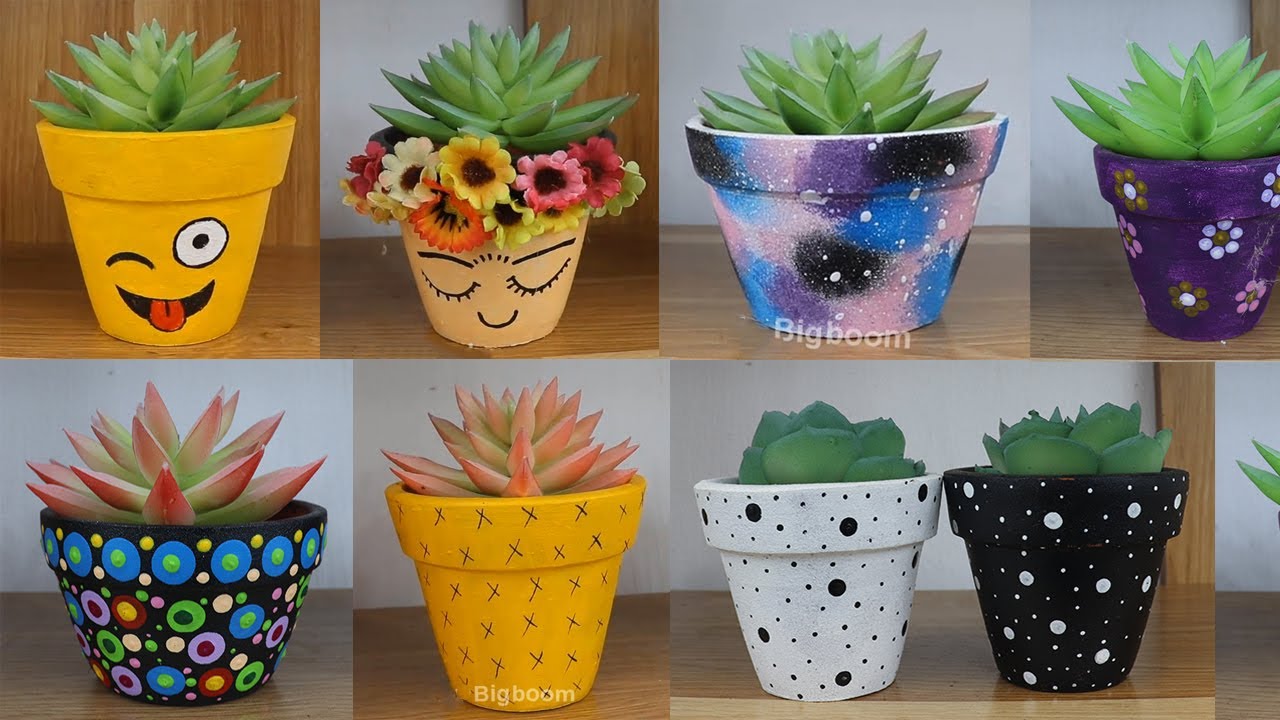
Once you master basic painting, try advanced designs. Stencils are a great tool for this. They help create intricate patterns without much effort. Place the stencil on the pot and hold it firmly. Use a sponge or small brush to apply paint over the stencil. Carefully remove the stencil to reveal the design.
Another advanced technique is freehand painting. This allows you to create unique and personalized designs. Use fine brushes for detailed work. Practice on paper before moving to the pot. This will help improve your skills. You can also use painter’s tape to create geometric patterns. Place the tape in the desired pattern and paint over it. Remove the tape once the paint is dry. This will leave clean, sharp lines.
Experiment with different colors and patterns. The possibilities are endless. Advanced designs add a special touch to your flower pots. They make your home more vibrant and welcoming.
Adding Decorative Elements
Adding decorative elements to your flower pots can make them unique and beautiful. You can use stencils and decals to create stunning designs. Let’s explore how to use these techniques to transform your flower pots.
Using Stencils
Stencils are a simple way to add detailed designs to your flower pots. Choose a stencil with a design that you love. Secure the stencil to your pot with tape. This will keep it in place while you paint.
Use a small brush or sponge to apply paint over the stencil. Make sure to cover all the open areas. Carefully remove the stencil and let the paint dry. You can use multiple stencils to create layered designs. Experiment with different colors for a vibrant look.
Applying Decals
Decals are another great option for decorating flower pots. They come in various designs and are easy to apply. Clean the surface of your pot thoroughly before applying the decal.
Peel off the backing paper from the decal. Place the decal on the pot and smooth it out with your fingers. Make sure there are no air bubbles. Press down firmly to ensure it sticks well. If the decal is large, you might need to cut it into smaller pieces for easier application.
Decals can add a professional touch to your flower pots. You can find decals in many different styles, from floral patterns to geometric shapes. Choose ones that match your decor.

Credit: www.pinterest.com
Finishing Touches
Once you’ve painted your flower pots, it’s time for the finishing touches. These final steps will make your pots look professional and unique. Let’s dive into sealing the paint and adding texture.
Sealing The Paint
Sealing the paint is essential to protect your design. Choose a clear sealant that’s suitable for outdoor use. This will ensure your pots withstand the elements.
Here’s a simple step-by-step guide:
- Allow the paint to dry completely.
- Apply a thin coat of sealant using a brush.
- Let the first coat dry for a few hours.
- Apply a second coat for extra protection.
- Leave the pots to dry overnight.
Sealing your pots will keep the colors vibrant and prevent chipping.
Adding Texture
Adding texture can give your flower pots a unique look. You can use different materials to achieve this effect.
Consider the following options:
- Sand: Mix sand with paint for a gritty finish.
- Fabric: Glue pieces of fabric onto the pot for a textured design.
- Twine: Wrap twine around the pot for a rustic look.
- Stencils: Use stencils to create raised patterns with modeling paste.
Experiment with different textures to find what you like best. Combining textures can make your flower pots stand out even more.
Remember, the key to great decorative pots is creativity. Don’t be afraid to try new techniques.
Planting In Your Pot
Creating decorative flower pots at home can be a fun and rewarding activity. Once you’ve designed your pot, the next step is to plant in it. This involves selecting the right plants, using proper soil, and knowing how to water them. Let’s dive into these essential steps to ensure your plants thrive.
Choosing Plants
Choosing the right plants is crucial for your decorative flower pot. You need to consider the size of your pot and the plant’s growth. Small pots work well with succulents or herbs. Larger pots can accommodate more extensive root systems like ferns or flowering plants.
Here are some plant suggestions based on pot size:
| Pot Size | Plant Type |
|---|---|
| Small | Succulents, Herbs |
| Medium | Ferns, Small Flowers |
| Large | Flowering Plants, Shrubs |
Sunlight is another factor. Some plants need full sun, while others thrive in shade. Always check the plant’s light requirements before planting.
Proper Soil And Watering
Using the right soil mix is vital for plant health. Potting soil is a great option as it provides nutrients and proper drainage. Avoid garden soil, which may compact and hinder root growth.
Follow these steps for proper soil preparation:
- Fill the pot with potting soil up to 2 inches below the rim.
- Gently remove the plant from its original container.
- Loosen the roots slightly before placing it in the pot.
- Add more soil around the plant, pressing lightly to remove air pockets.
Watering is another critical aspect. Overwatering can lead to root rot, while underwatering can cause wilting. Follow these tips for optimal watering:
- Check soil moisture before watering. Stick your finger 1 inch into the soil.
- If the soil is dry, water until it drains from the bottom.
- Allow the soil to dry slightly between waterings.
Remember, different plants have different water needs. Adjust your watering schedule based on the plant type and environmental conditions.
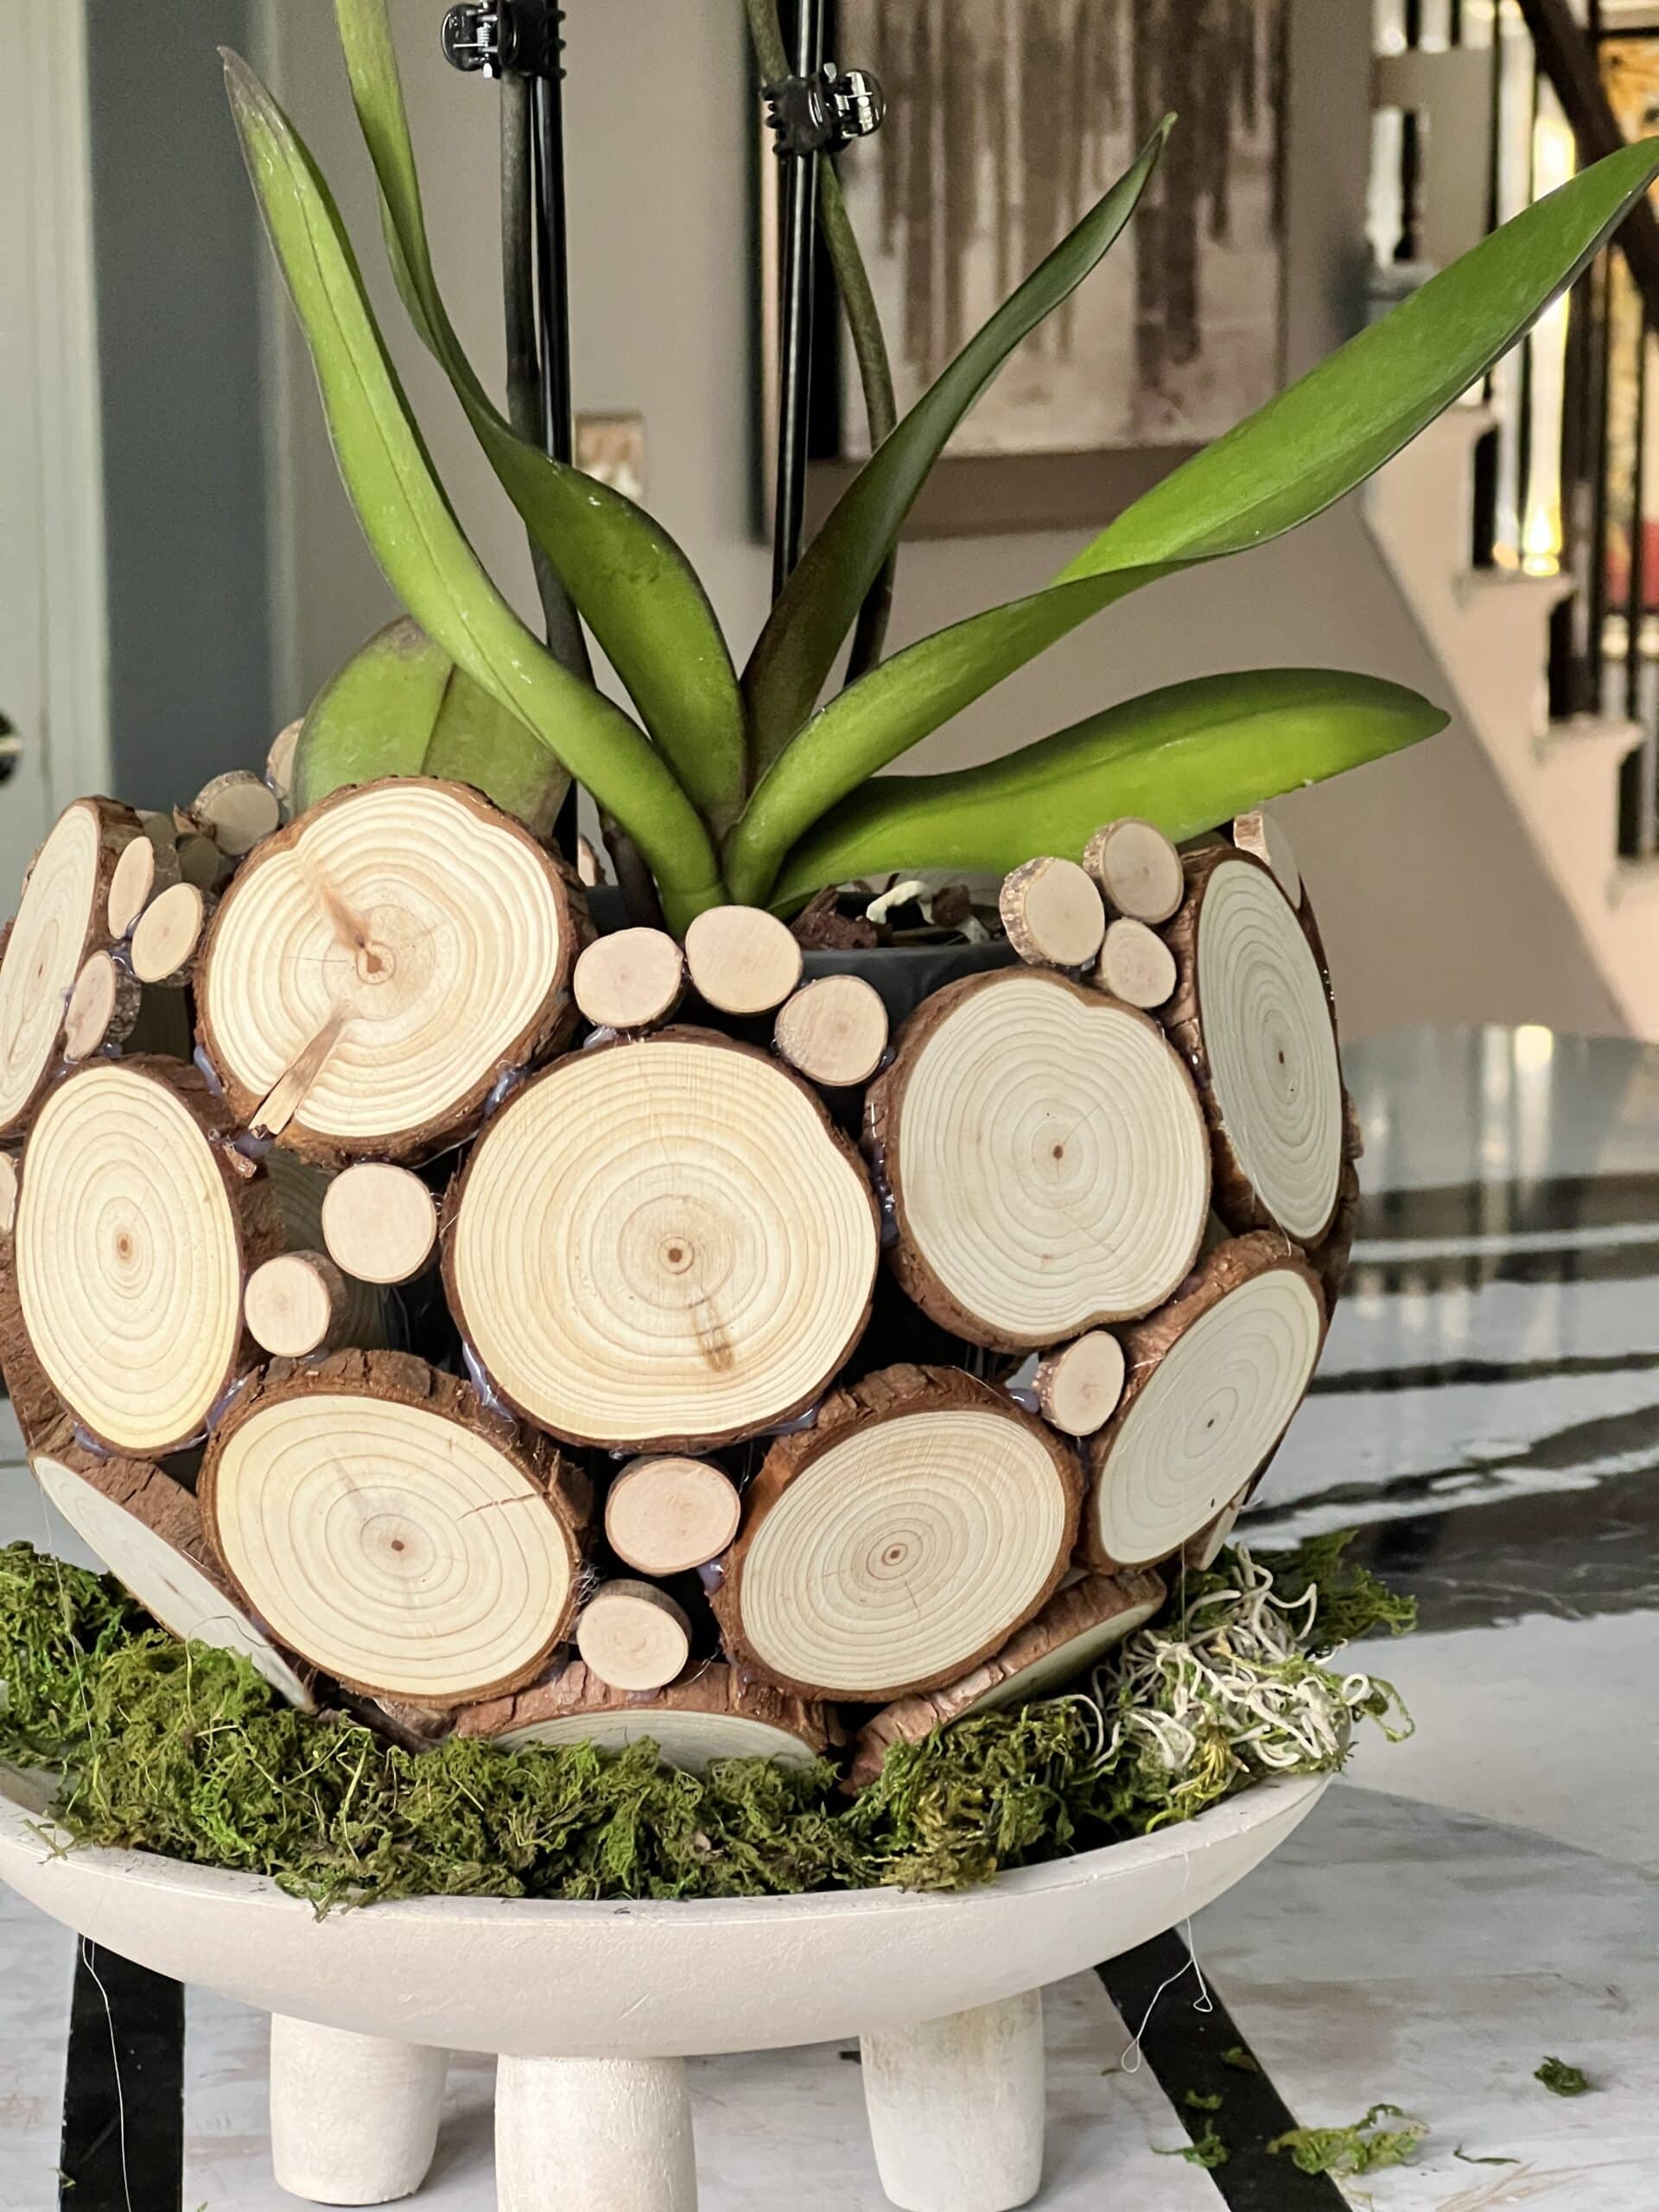
Credit: www.sonatahomedesign.com
Caring For Your Decorative Pots
Caring for your decorative flower pots is essential to keep them looking beautiful and lasting longer. Proper care ensures that your plants thrive and your pots remain in good condition. In this section, we will provide you with some practical tips to maintain and care for your decorative pots.
Maintenance Tips
Regularly clean your pots to prevent dirt buildup. Use a mild soap and water solution for cleaning. Avoid harsh chemicals that can damage the pots. Check for cracks or chips and repair them promptly. This helps in preventing further damage.
Ensure proper drainage to avoid waterlogging. Use pots with drainage holes or add a layer of gravel at the bottom. Rotate your pots occasionally to ensure even sunlight exposure. This helps in the healthy growth of your plants. Inspect your plants for pests and diseases regularly. Treat them immediately to prevent spread.
Seasonal Care
Adjust care routines based on the season. In spring and summer, water your plants more frequently. The weather is usually warmer and plants need more water. Fertilize your plants to boost growth during these seasons.
In fall and winter, reduce watering. The cooler weather means plants need less water. Protect your pots from frost by moving them indoors or covering them. Use mulch to retain moisture and protect the roots from extreme cold.
Remember, the key to healthy decorative pots is consistent and proper care throughout the year. Following these simple tips will help you maintain beautiful and thriving plants.

Credit: www.youtube.com
Conclusion
Creating decorative flower pots at home is fun and easy. It adds personal touch to your space. You can use simple materials. Get creative with designs and colors. These DIY pots can brighten up any room. Plus, they make great gifts for friends.
Try different styles to match your decor. Enjoy the process and the beautiful results. Happy crafting!
