How to Make Decorative Candles at Home: A Step-by-Step Guide
Making decorative candles at home is fun and rewarding. You can create beautiful candles that suit your style.
Candles bring warmth and charm to any space. Store-bought candles can be pricey, and they may not have your personal touch. That’s why making your own is a great idea. You get to choose your favorite colors, scents, and designs.
Plus, it’s a relaxing and creative activity. Whether you want to make candles for yourself or as gifts, it’s easier than you might think. This guide will show you the steps to make stunning decorative candles at home. So, get ready to dive into this delightful craft and make your space shine with your unique creations.
Introduction To Decorative Candles
Decorative candles add charm and warmth to any space. They create a cozy atmosphere and are perfect for relaxation. Making decorative candles at home is fun and rewarding. You can customize them to fit your style and preferences.
Benefits Of Making Your Own
Creating your own decorative candles has many benefits. It’s a cost-effective hobby. Store-bought candles can be expensive. Making them at home saves money. It also allows for creativity. You choose the colors, shapes, and scents. Homemade candles make great gifts too. They are personal and thoughtful.
Another benefit is the control over ingredients. Many store-bought candles contain chemicals. Making your own lets you use natural ingredients. This is better for your health and the environment. It’s also a relaxing activity. Candle making can reduce stress. It provides a sense of accomplishment.
Types Of Decorative Candles
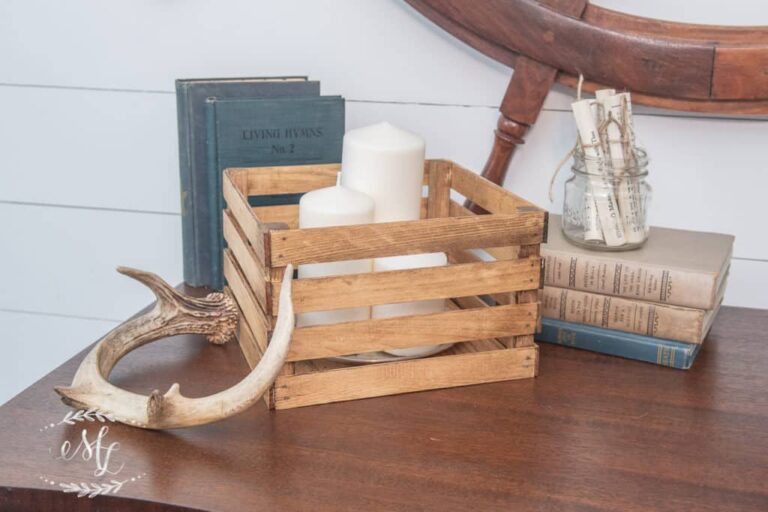
There are various types of decorative candles. Each type offers unique beauty. Pillar candles are one popular choice. They are thick and sturdy. Often used as centerpieces. They come in many sizes and colors.
Votive candles are small and versatile. They fit in many holders. Perfect for creating ambiance. Tea light candles are even smaller. They are great for accent lighting. They also work well in groups.
Jar candles are another type. They come in glass jars. Easy to make and very safe. Floating candles are unique. They float on water. Ideal for special occasions. Each type of candle adds its own charm to your home.

Credit: www.wikihow.com
Gathering Materials
Creating decorative candles at home can be a fun and rewarding activity. The first step in this process is gathering all the necessary materials. Having everything in place ensures a smooth and enjoyable candle-making experience.
Essential Supplies
To start, you need a few essential supplies. These include wax, wicks, and a container. Choose wax that suits your needs, such as soy, beeswax, or paraffin. Wicks are crucial for burning and should match the size of your container. Containers can be glass jars, tins, or molds. Ensure they are heat-resistant.
Next, get a double boiler or a heat-safe bowl. This is for melting the wax. A thermometer is also important. It helps you monitor the wax temperature. Lastly, have a stirring utensil. This can be a spoon or a stick. It helps mix the wax evenly.
Optional Add-ons For Decoration
Optional add-ons can make your candles unique. Fragrance oils add a pleasant scent. Choose oils that are safe for candle-making. Color dyes can give your candles vibrant hues. Use dyes that blend well with your wax.
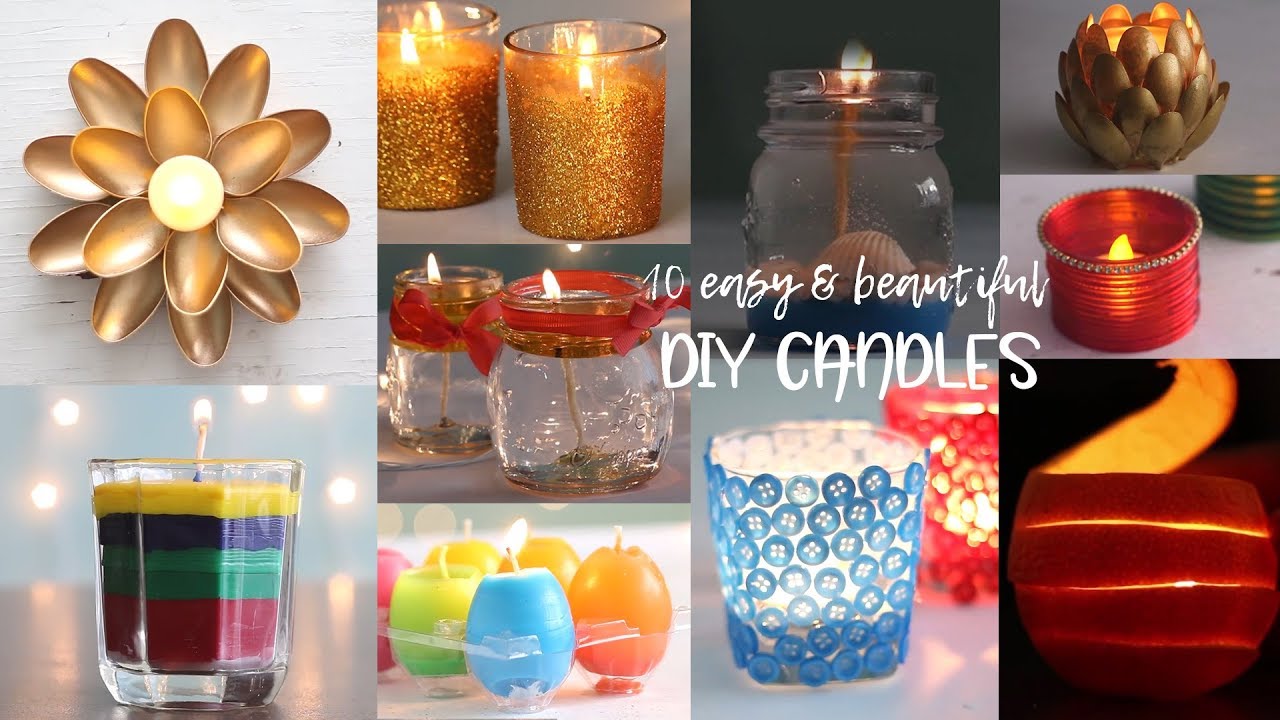
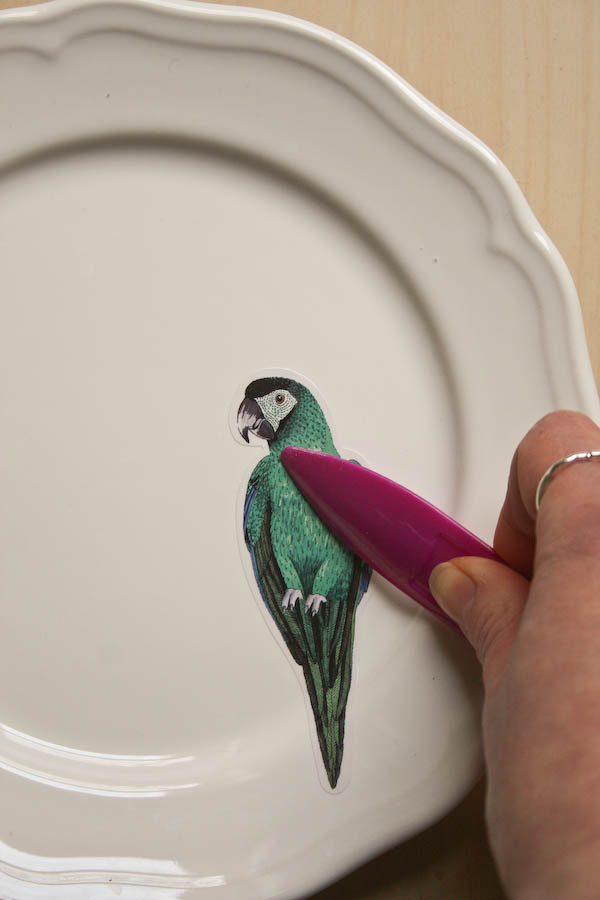
You can also add dried flowers or herbs. These give a natural and rustic look. Glitter can add a sparkle effect. Be cautious with the amount. Too much can affect burning. Decorative stickers or labels are great for personalizing your candles. They also make your candles look professional.
Choosing The Right Wax
Choosing the right wax is crucial for making decorative candles at home. The type of wax you choose affects the candle’s appearance, burn time, and fragrance. Let’s explore the most popular wax options: paraffin, soy, and beeswax.
Paraffin Wax
Paraffin wax is a common choice for candle making. It is affordable and easy to use. This wax offers a smooth finish and holds color well. Paraffin wax also has a strong scent throw, making it ideal for scented candles. However, it is a petroleum by-product and not eco-friendly.
Soy Wax
Soy wax is a natural alternative to paraffin wax. It is made from soybean oil. Soy wax burns cleaner and longer than paraffin. It is biodegradable and renewable. This wax is also great for holding fragrance. The only downside is that it can be more expensive than paraffin.
Beeswax
Beeswax is another natural option for candle making. It is produced by honeybees. Beeswax candles burn the longest and emit a natural honey scent. They also purify the air by releasing negative ions. Beeswax is more costly, but it is worth it for its natural benefits. It is also hypoallergenic and ideal for people with allergies.

Credit: www.pinterest.com
Preparing The Work Area
Ensure a clean, clutter-free workspace before starting. Gather all necessary materials within reach. This helps maintain focus and safety.
Creating decorative candles at home can be a fun and rewarding activity. Before you begin, it is important to prepare your work area. This will help you stay organized and ensure your safety. A well-prepared workspace makes the candle-making process smooth and enjoyable.Safety Precautions
Safety should always be your top priority. Start by choosing a well-ventilated area. This helps to avoid inhaling any harmful fumes. Keep a fire extinguisher nearby. This is crucial in case of any accidental fires. Wear protective gloves to avoid burns from hot wax. Also, use safety goggles to protect your eyes from any splashes.Organizing Tools And Materials
Gather all your tools and materials before starting. You will need wax, wicks, molds, and essential oils. Have a thermometer to monitor the wax temperature. Place all your tools in a reachable spot. This ensures you can easily access them while working. Use old newspapers or a plastic sheet to cover your work surface. This helps to keep your area clean and makes cleaning up easier. By preparing your work area properly, you can enjoy making your decorative candles without any hassle. “`Melting The Wax
Creating decorative candles at home starts with melting the wax. Properly melted wax ensures smooth and beautiful candles. There are two popular methods to melt wax: the double boiler method and the microwave method. Let’s explore each method step-by-step.
Double Boiler Method
The double boiler method is a safe and controlled way to melt wax. First, fill a pot with water. Place a smaller pot or heat-safe container inside the larger pot. This creates a double boiler. Ensure the smaller pot does not touch the water.
Next, add wax to the smaller pot. Turn on the stove to medium heat. The water in the larger pot should simmer, not boil. Stir the wax gently as it melts. Use a thermometer to monitor the wax temperature. Aim for 150-180 degrees Fahrenheit.
Once the wax is fully melted, remove the smaller pot from the heat. Be careful, the wax will be hot. You are now ready to add fragrance or color if desired.
Microwave Method
The microwave method is quick and convenient. Start by placing wax pieces in a microwave-safe container. Do not fill the container to the top. Leave some space for the wax to expand.
Set the microwave to medium power. Heat the wax in 30-second intervals. Stir the wax between each interval. This ensures even melting and prevents overheating. Continue until the wax is fully melted.
Use a thermometer to check the wax temperature. It should be between 150-180 degrees Fahrenheit. If the wax is too hot, let it cool slightly. Now, your melted wax is ready for the next step.

Credit: www.youtube.com
Adding Color And Fragrance
Decorative candles add charm to any space. Adding color and fragrance makes them even more special. Let’s explore how to enhance your homemade candles with vibrant dyes and delightful essential oils.
Using Dyes
Adding color to your candles is easy and fun. You can choose from various types of dyes:
- Liquid Dyes: Simple to use and mix well.
- Solid Dyes: Often come in blocks or chips, melted into the wax.
- Powder Dyes: Provide intense color but need thorough mixing.
Follow these steps to add dye:
- Melt the wax in a double boiler.
- Add a small amount of dye.
- Stir until the dye dissolves completely.
- Test the color by placing a drop on a white surface.
- Adjust the amount of dye to achieve the desired shade.
Adding Essential Oils
Essential oils bring a pleasant aroma to your candles. Here are some popular choices:
- Lavender: Calming and relaxing.
- Lemon: Fresh and uplifting.
- Vanilla: Warm and comforting.
To add essential oils:
- Melt the wax and add the dye first.
- Remove the wax from heat.
- Add essential oils, about 1 ounce per pound of wax.
- Stir gently but thoroughly to blend the oils.
- Pour the wax into molds and let it cool.
Experiment with different colors and scents to create unique candles. Enjoy the process and have fun crafting your own decorative candles at home.
Pouring The Wax
Pouring the wax is a crucial step in making decorative candles at home. It is where your creativity shines and your design takes shape. This step requires precision and patience. The wax must be melted and poured carefully to ensure a smooth finish. Let’s dive into the details.
Setting The Wick
The wick is the heart of your candle. Without it, the candle won’t burn. Start by attaching the wick to the bottom of your container. Use a dab of hot glue or a wick sticker. Ensure it is centered for an even burn.
- Secure the wick holder across the top of the container.
- Pull the wick tight and straight.
- Trim the wick to 1 inch above the holder.
Layering Colors
Layering colors adds depth and beauty to your candles. To achieve this, you need to pour wax in stages.
- Melt your first color wax and pour it into the container.
- Let it cool until it forms a thin skin on top.
- Melt your second color wax and pour it over the first layer.
- Repeat with additional colors as desired.
Each layer should be poured carefully to prevent mixing. Allow each layer to cool before adding the next. This creates a beautiful striped effect.
| Step | Description |
|---|---|
| 1 | Melt and pour the first color wax. |
| 2 | Let it cool until a thin skin forms. |
| 3 | Melt and pour the next color wax. |
| 4 | Repeat for additional layers. |
Layering colors can make your candle unique and stylish. Experiment with different color combinations for a custom look. Enjoy the process and let your creativity flow!
Decorating And Finishing Touches
Decorating and finishing touches are the fun part of making candles. This is your chance to get creative. You can make your candles unique and beautiful.
Using Molds
Using molds can give your candles interesting shapes. Silicone molds are great. They are flexible and easy to use. You can find molds in many shapes. Try stars, hearts, or flowers.
Pour the melted wax into the mold. Let it cool and harden. Then, remove the candle from the mold. You will have a perfect shape every time.
Adding Embellishments
Adding embellishments can make your candles stand out. You can use dried flowers or herbs. Place them in the mold before pouring the wax. They will be visible on the candle surface.
Glitter is another option. Add it to the melted wax. Stir gently. The glitter will spread throughout the candle. You can also paint designs on the candles. Use non-toxic paint for safety.
Ribbons and beads can be wrapped around the candle base. Secure them with glue. This adds a touch of elegance. Try different combinations. See what you like best.
Cooling And Setting
After pouring the wax into molds, cooling and setting are crucial steps. Proper cooling ensures your candles solidify evenly. These steps impact the final look and function of your decorative candles. Let’s explore effective cooling techniques and how to remove candles from molds.
Proper Cooling Techniques
Let the candles cool at room temperature. Avoid placing them in the fridge. Rapid cooling can cause cracks and imperfections. Place the molds on a flat surface. Ensure the area is free from drafts or extreme temperatures. This helps the wax to settle evenly.
Keep the molds undisturbed for several hours. Larger candles need more time to cool. Patience during this stage leads to better results. You can check the surface of the wax. It should be firm and cool to the touch before moving to the next step.
Removing From Molds
Once the candles are completely cool, removing them from molds is the next step. Gently tap the sides of the mold. This helps to loosen the candle. If the candle does not come out easily, place the mold in the freezer for a few minutes. This slight temperature change can help release the candle.
Be careful not to damage the candle. Use a soft cloth to handle them. This keeps the surface smooth and free from fingerprints. With practice, removing candles from molds becomes easier and more efficient.
Troubleshooting Common Issues
Making decorative candles at home can be fun and rewarding. But sometimes, things don’t go as planned. You might see air bubbles or uneven surfaces. Don’t worry! These are common issues with easy fixes. Let’s look at how to solve them.
Fixing Air Bubbles
Air bubbles can ruin the look of your candle. To avoid this, pour the wax slowly. Stir it gently to release trapped air. You can also tap the mold on a flat surface. This helps the bubbles rise to the top.
If you see bubbles after the wax sets, use a hairdryer. Gently heat the candle’s surface. The warmth will pop the bubbles. Be careful not to melt the candle.
Correcting Uneven Surfaces
Sometimes, your candle might have an uneven surface. This can happen if the wax cools too fast. To fix this, re-melt the top layer. Use a heat gun or hairdryer. Smooth the surface with a warm spoon.
To prevent uneven surfaces, let the wax cool slowly. Keep the mold in a warm place. This helps the wax settle evenly. Also, avoid sudden movements while the wax is setting.
Candle Care And Maintenance
Candle care and maintenance are important for the longevity of your decorative candles. Proper care ensures they remain beautiful and safe to use. Follow these simple steps to maintain your candles and keep them looking their best.
Proper Storage
Store candles in a cool, dark place to prevent melting. Keep them away from direct sunlight. This helps maintain their color and shape. Use airtight containers to protect the scent. Store candles upright to avoid warping.
Cleaning Candle Holders
Remove wax residue from holders with warm, soapy water. Avoid using harsh chemicals. For stubborn wax, place the holder in the freezer for an hour. This makes it easy to pop out the wax. Wipe the holder with a soft cloth for a shiny finish.
Conclusion And Final Thoughts
Crafting decorative candles at home offers a fun and creative activity. Experiment with colors, shapes, and scents to personalize your candles. Enjoy the process and create beautiful, unique pieces for your home or gifts for loved ones.
Creating decorative candles at home is a delightful and rewarding hobby. It not only allows you to express your creativity but also provides a sense of accomplishment. By following simple steps, you can make beautiful candles that suit your style and preference. The process is fun, cost-effective, and gives you a unique way to decorate your space or make thoughtful gifts.Personalizing Your Candles
Personalizing your candles can be as easy as adding a favorite scent. Try using essential oils like lavender, vanilla, or citrus. You can also experiment with different colors. Use dye blocks or liquid dyes to create vibrant hues. Consider embedding objects like dried flowers, seashells, or beads. This adds a unique touch and makes each candle special. Use different molds to create various shapes and sizes. This can range from classic pillars to intricate designs. Adding a personal touch makes your candles truly one-of-a-kind.Gift Ideas And Uses
Handmade candles make excellent gifts for any occasion. Birthday, anniversary, or housewarming, they are always appreciated. Customize them to match the recipient’s taste. For example, use their favorite color or scent. Candles can also serve as unique wedding favors. They add a personal touch and leave a lasting impression. Beyond gifts, candles enhance home décor. Use them to create a cozy atmosphere in your living room. Place them in the bathroom for a spa-like experience. Light them during a dinner party to set a warm, inviting mood. The possibilities are endless. “`Conclusion
Crafting decorative candles at home is fun and rewarding. These candles add a personal touch to your space. Plus, they make lovely gifts for friends and family. You don’t need fancy tools or skills. Just follow the simple steps outlined in this guide.
Experiment with different colors and scents. Get creative with molds and decorations. Enjoy the process and the beautiful results. Making your own candles can become a delightful hobby. So, gather your supplies and start creating today!
