How to Make a Paper Wreath for Home Decoration: Easy DIY Tips
Creating a paper wreath for home decoration is both fun and easy. It adds a personal touch to any space.
In this guide, you will learn the steps to make a beautiful paper wreath. Paper wreaths are a delightful craft that anyone can make. They are perfect for seasonal decorations or special occasions. You only need a few materials, like colored paper, glue, and scissors.
Making a paper wreath is a great way to show creativity and spend quality time with family. It is also a budget-friendly option to decorate your home. Whether you want a simple design or something more elaborate, this project is perfect for beginners and experienced crafters alike. Get ready to transform your home with this charming paper decoration!
Materials Needed
Creating a paper wreath for home decoration is a fun project. Before you start, gather the materials you need. This section will help you understand what you need to make your wreath.
Paper Types
The type of paper you use will affect your wreath’s look. Choose from colored paper, patterned paper, or even recycled paper. Construction paper is great for a sturdy wreath. Scrapbook paper adds a unique touch. You can also use old magazines for a colorful, eco-friendly option.
Tools And Supplies
A few basic tools are essential for this craft. You will need scissors or a craft knife. Make sure they are sharp for clean cuts. A cutting mat will protect your surface. Glue sticks or a hot glue gun will help you attach the paper pieces. Use a ruler for straight lines and a pencil for marking measurements.
Other supplies include a wreath base. You can buy one or make your own from cardboard. A hole punch is useful for making holes if you want to add ribbons. Lastly, have some string or ribbon for hanging your finished wreath. With these materials, you are ready to start crafting your beautiful paper wreath.
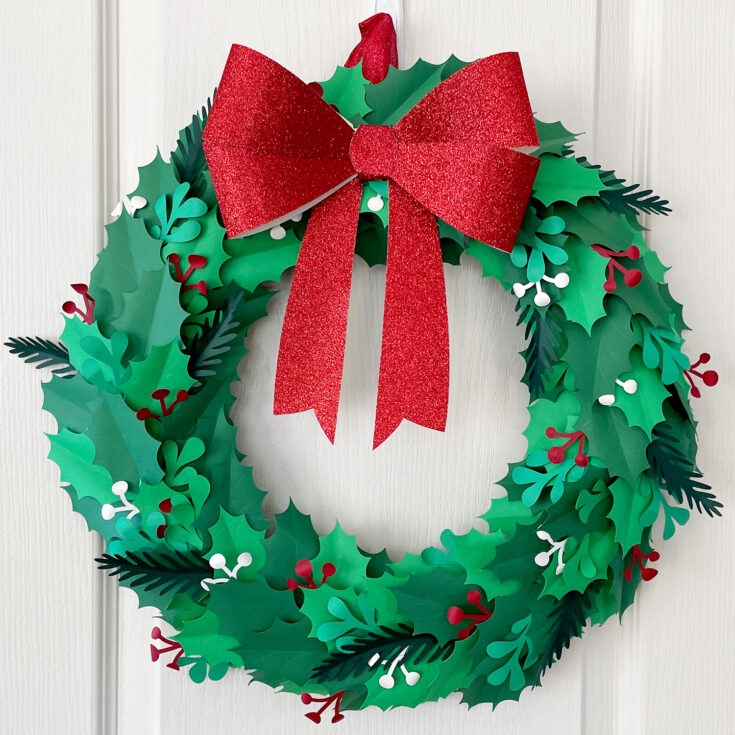
Credit: specialheartstudio.com
Choosing Your Design
Choosing the design for your paper wreath is an exciting step. Your design sets the tone and mood of your decoration. It’s important to select a theme and color scheme that complements your home.
Themes And Colors
First, think about the overall theme of your home. Do you prefer modern or traditional styles? Consider colors that match your home decor. Bright colors can make your wreath pop. Soft pastels can create a calm, serene look. You can mix different shades of the same color for a cohesive design.
Patterns can also add a unique touch. Stripes, polka dots, or floral patterns can make your wreath stand out. Choose patterns that blend well with your chosen colors. Your wreath should reflect your personal style.
Seasonal Inspirations
Seasonal themes can inspire your wreath design. For spring, use pastel colors and floral patterns. Summer wreaths can feature bright, bold colors and tropical designs. For fall, incorporate warm tones like orange, red, and yellow. Use leaves, pumpkins, or acorns as decorative elements.
Winter wreaths can showcase cool colors like blue and silver. Add snowflakes or pinecones for a festive touch. Seasonal themes make your wreaths relevant and timely. They can bring a fresh look to your home decor throughout the year.
Remember to choose a design that excites you. Your enthusiasm will shine through in your creation. Happy crafting!
Cutting The Paper
Cutting the paper is a crucial step in creating your paper wreath. The shapes you cut will determine the overall look and feel of your decoration. Whether you are a beginner or more experienced, there are techniques that can help you achieve beautiful results.
Basic Shapes
Start with simple shapes like circles, squares, and triangles. These are easy to cut and can be arranged in various ways. Use a pencil to trace your shapes on the paper. Scissors work well for these basic cuts.
Creating uniform shapes is key. Use templates or stencils if you have them. This ensures consistency in your design. For a more natural look, hand-cut each piece without a template.
Advanced Techniques
Once you master basic shapes, try more complex designs. Think about leaves, flowers, or stars. These add an intricate touch to your wreath. Use a craft knife for precise cuts. A cutting mat will protect your surface.
Experiment with different paper types. Tissue paper, cardstock, or even recycled materials. Each type offers a unique texture and effect. Layering different shapes can create depth and dimension in your wreath.
For an extra challenge, try quilling. This involves rolling strips of paper into coils and shapes. It adds a unique, textured look to your wreath. Patience is key with these advanced techniques. The results are worth the effort.
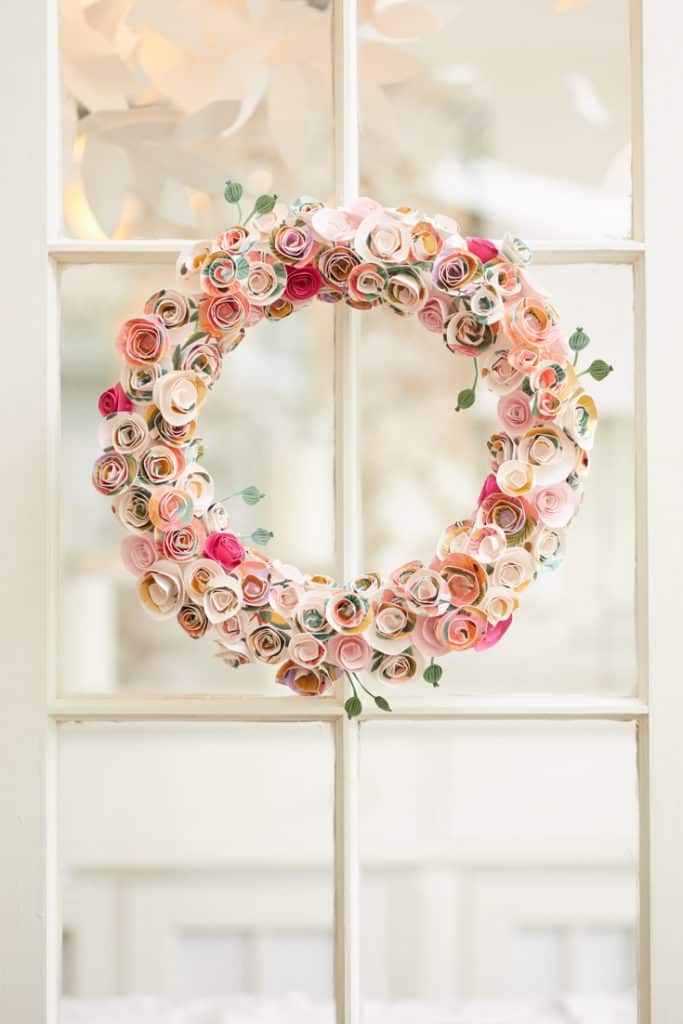
Credit: happyhappynester.com
Assembling The Wreath
Assembling a paper wreath can be a fun and rewarding project. With a few simple steps, you can create a beautiful decoration for your home. In this section, we will guide you through the process of putting your paper wreath together. Let’s start with creating the base and then move on to attaching the paper pieces.
Creating The Base
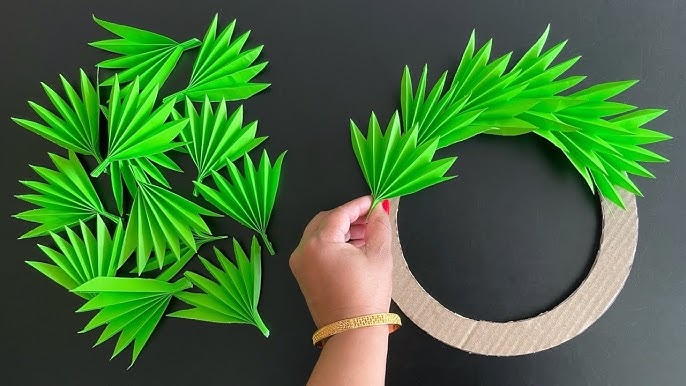
The base of your wreath is very important. It provides the structure and shape. You can use a foam ring or a cardboard circle. Cut the cardboard into a perfect circle. Make sure the size fits your door or wall space. If using foam, you can find pre-made foam rings at craft stores. Cover the base with a layer of colored paper or fabric. This will give it a neat and finished look. Use glue or tape to secure the covering material.
Attaching The Paper Pieces
Now that the base is ready, it’s time to attach the paper pieces. Cut your paper into various shapes. Leaves, flowers, and other designs work well. Use a mix of colors to add interest. Begin by gluing the larger pieces first. Arrange them evenly around the base. Fill in the gaps with smaller pieces. Overlap the edges slightly to create a layered effect. Ensure the pieces are securely glued. Let the glue dry completely before hanging your wreath.
Adding Decorations
Adding decorations to your paper wreath can make it unique and vibrant. Simple embellishments can transform your wreath into a stunning centerpiece. Let’s explore two decoration ideas: ribbons and bows, and personal touches.
Ribbons And Bows
Ribbons and bows add charm to any wreath. Use bright colors or patterned ribbons for a festive look. Follow these steps to add ribbons and bows:
- Choose a ribbon that complements your wreath.
- Cut the ribbon to the desired length.
- Wrap the ribbon around the wreath, securing it with glue or tape.
- Create a bow by looping the ribbon and tying it in the center.
- Attach the bow to the top or bottom of the wreath.
These simple steps can add a touch of elegance to your paper wreath.
Personal Touches
Adding personal touches makes your wreath special. Use items that reflect your personality or the season. Here are some ideas:
- Photos: Attach small photos of family or friends.
- Small Ornaments: Add mini ornaments for a festive feel.
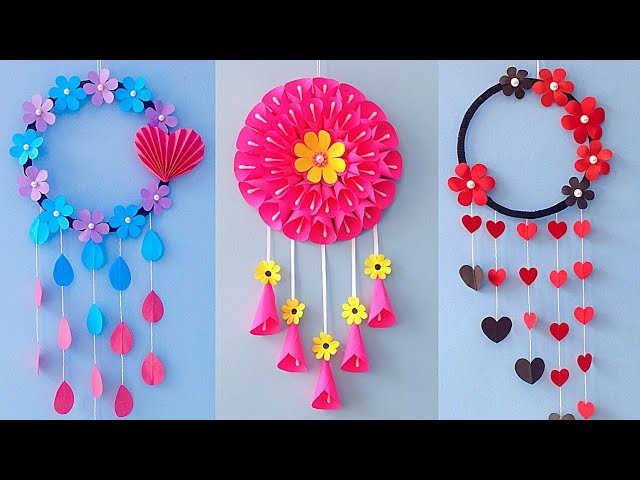
- Flowers: Use paper or fabric flowers to add color.
- Letters: Spell out words or initials with small wooden letters.
These personal touches can make your wreath stand out. Experiment with different decorations to find the perfect look.

Credit: m.youtube.com
Hanging Your Wreath
Once you have finished making your beautiful paper wreath, the next step is hanging it. This part is crucial because the right spot and method can enhance its beauty. Let’s explore the best ways to hang your wreath for maximum impact.
Choosing The Right Spot
First, decide where you want to display your wreath. Here are some ideas:
- Front Door: A classic choice that welcomes guests warmly.
- Living Room: Above the fireplace or on a feature wall.
- Windows: Adds a festive touch to your home from the outside.
- Bedroom: On the wall or door for a personal touch.
Choose a spot with enough light to highlight your wreath’s colors and details. Make sure the location does not expose the wreath to harsh weather if it’s outside.
Securing The Wreath
Now that you’ve chosen the perfect spot, it’s time to hang your wreath securely. Here are some methods:
| Method | Details |
|---|---|
| Wreath Hanger | Easy to use, just hang it over the door. |
| Ribbon | Tie a ribbon around the wreath and hang it from a nail or hook. |
| Command Hooks | Great for avoiding damage to walls or doors. |
| Nails or Screws | Use these for a more permanent solution. |
Ensure the wreath is balanced and does not tilt. If using a ribbon or hook, double-check that it is strong enough to hold the wreath’s weight.
Avoid hanging the wreath in high-traffic areas where it might get knocked down. Enjoy the beauty and charm it adds to your home!
Maintaining The Wreath
After crafting a beautiful paper wreath, maintaining it is crucial. Proper care can keep it looking fresh and vibrant for a long time. This section offers practical tips to help you maintain your paper wreath with ease.
Cleaning Tips
Cleaning a paper wreath requires a gentle approach. Follow these simple steps to ensure your wreath remains spotless:
- Use a soft, dry cloth to dust the wreath regularly.
- Avoid using water or any liquid cleaners to prevent damage.
- If the wreath gets dirty, use a soft brush to remove the dirt.
- Handle the wreath with care to avoid tearing the paper.
Storing For Longevity
Proper storage is key to extending the life of your paper wreath. Here are some tips for storing it effectively:
- Store the wreath in a cool, dry place away from sunlight.
- Use a large plastic bag or a storage box to protect it from dust.
- Place tissue paper between layers if storing multiple wreaths.
- Avoid placing heavy objects on top of the wreath to prevent flattening.
Following these tips will help maintain the beauty and longevity of your paper wreath. Enjoy your stunning creation year-round!
Creative Variations
Creating a paper wreath for home decoration is a fun and creative project. The best part is that you can explore different styles to make your wreath unique. In this section, we will explore some creative variations that you can try.
Different Shapes
Traditional wreaths are often circular, but you can experiment with other shapes to add a unique twist to your decoration. Here are some ideas:
- Square Wreaths: Use a square base instead of a circular one.
- Heart Wreaths: Perfect for romantic occasions or Valentine’s Day.
- Star Wreaths: Great for a festive look, especially during holidays.
To create these shapes, cut your base material accordingly and attach the paper elements as you would for a circular wreath.
Unique Materials
Paper wreaths don’t have to be made from standard craft paper. You can use a variety of materials to add texture and visual interest:
- Book Pages: Repurpose old book pages for a vintage look.
- Newspaper: Use newspaper for an eco-friendly option.
- Magazine Pages: Add color and patterns by using magazine pages.
- Scrapbook Paper: Choose scrapbook paper in different designs and colors.
Using different materials can make your wreath stand out and match your home’s décor.
Experiment with these creative variations to make your paper wreath truly unique. Whether you choose different shapes or unique materials, your wreath will be a beautiful addition to your home decoration.
Conclusion
Creating a paper wreath adds charm to any home. It’s simple and fun. You only need a few materials. Follow the steps mentioned above. Enjoy the crafting process. Let your creativity shine. Hang your wreath with pride. Guests will love your handmade decoration.
Making paper wreaths can become a delightful hobby. Try different colors and patterns. Happy crafting!
