How to Make a Miniature Rustic Dress for Home Decor: Step-by-Step Guide
Creating a miniature rustic dress for home decor is a delightful project. It adds charm and a personal touch to any space.
Rustic decor brings a cozy and warm feeling to homes. Miniature dresses, with their vintage appeal, can elevate this charm. They are perfect for decorating shelves, mantels, or even as unique gifts. This DIY project is fun and easy, even for beginners.
You don’t need many materials or advanced sewing skills. With a few simple steps, you can create a beautiful rustic dress that will enhance your home decor. Ready to start crafting? Let’s dive into the world of miniature dress-making for a rustic touch!
Materials Needed
Creating a miniature rustic dress for home decor is both fun and rewarding. Before you start, gather all the necessary materials. This ensures a smooth crafting process. Let’s explore the materials you’ll need.
Fabric Choices
Selecting the right fabric is crucial. It sets the tone for your miniature dress. Here are some popular options:
- Cotton: Soft and easy to work with.
- Linen: Gives a rustic and natural look.
- Burlap: Adds a rough and vintage feel.
Choose a fabric that matches your desired rustic theme. You can even mix different fabrics for a unique look.
Tools And Accessories
Having the right tools and accessories makes the project easier. Here’s a list of what you’ll need:
| Tool | Purpose |
|---|---|
| Scissors | For cutting fabric. |
| Needle and Thread | For sewing the dress. |
| Glue Gun | For attaching decorations. |
| Ruler | For measuring fabric. |
Accessories can enhance the look of your dress. Consider adding:
- Buttons: Adds charm and detail.
- Lace: Gives a delicate touch.
- Ribbons: Adds color and texture.
With these materials, your miniature rustic dress will be stunning. Get ready to create a beautiful piece for your home decor.

Credit: www.amazon.com
Preparing The Fabric
Creating a miniature rustic dress for home decor starts with preparing the fabric. This step is crucial for ensuring your dress looks polished and professional. Follow these guidelines to get your fabric ready for sewing.
Measuring And Cutting
Before you start cutting, measure your fabric accurately. Use a ruler or measuring tape for precise measurements. Write down the dimensions you need for each piece of the dress.
| Part | Measurement (inches) |
|---|---|
| Bodice | 8 x 5 |
| Skirt | 12 x 8 |
| Sleeves | 4 x 3 |
Once your measurements are ready, it’s time to cut the fabric. Use a sharp pair of scissors to ensure clean, straight edges. Cutting carefully will make sewing much easier.
Sewing Basics
Now that your fabric is cut, it’s time to start sewing. If you are new to sewing, begin with simple stitches. The running stitch and the backstitch are great for beginners.
- Thread your needle with a matching thread.
- Start sewing from one end of the fabric.
- Use small, even stitches for a neat look.
For a rustic look, consider using a thicker thread. This will give the dress a more textured appearance. Don’t worry if your stitches are not perfect. Imperfections add to the charm of a rustic dress.
Once you have sewn the main pieces together, add any additional details like buttons or lace. These elements will make your miniature dress stand out in your home decor.
Creating The Dress Shape
Creating a miniature rustic dress for home decor is a fun and rewarding project. This guide will walk you through creating the dress shape, ensuring your dress has the perfect form. Let’s break it down into two main parts: the bodice and the skirt.
Assembling The Bodice
Start by cutting a piece of fabric for the bodice. Use a soft, rustic fabric like burlap or linen. The dimensions should be about 4 inches wide and 6 inches long. Fold the fabric in half to find the center. Place a small piece of cardboard inside for structure.
Next, stitch the sides of the fabric together. Ensure that the stitches are neat and even. You can use a needle and thread or a sewing machine. Once stitched, turn the fabric inside out to hide the stitches. This will form a simple, rustic bodice.
Forming The Skirt
For the skirt, cut a piece of fabric that is 10 inches wide and 8 inches long. Gather the top edge of the fabric by sewing a loose stitch along one side. Pull the thread to create ruffles, giving the skirt a full, rustic look.
Attach the skirt to the bodice by sewing the gathered edge to the bottom of the bodice. Ensure that the skirt is evenly distributed around the bodice. You can add a small ribbon or lace at the waistline for a decorative touch.
| Component | Fabric Dimensions |
|---|---|
| Bodice | 4 inches x 6 inches |
| Skirt | 10 inches x 8 inches |
And there you have it! Your miniature rustic dress is now taking shape. This charming little dress will add a cozy, handcrafted touch to your home decor.

Credit: dunritechristmasshop.com
Adding Rustic Details
Creating a miniature rustic dress for home decor is a delightful project. Adding rustic details can truly enhance the charm. These small touches will make your miniature dress look authentic and vintage. Let’s explore some ways to add those perfect rustic details.
Lace And Trim
Adding lace and trim can instantly give your miniature dress a rustic feel. Choose lace in natural colors like beige or ivory. This will blend well with the rustic theme. You can sew the lace along the hemline or around the neckline.
Another option is to use burlap trim. Burlap has a coarse texture that adds to the rustic look. You can glue or sew burlap trim to the edges. This will give the dress a handcrafted appearance.
| Lace Types | Suitable Uses |
|---|---|
| Cotton Lace | Hemlines, Necklines |
| Crochet Lace | Sleeves, Collars |
Buttons And Beads
Buttons and beads are small but significant details. They can add a lot of character to your rustic dress. Choose wooden buttons for a natural look. These are perfect for a rustic theme. Sew them onto the front of the dress or use them as decorative accents.
Beads can also add a unique touch. Select beads in earthy tones like brown, green, and amber. You can stitch them onto the dress in a pattern. This will add texture and visual interest.
- Wooden Buttons: Natural and rustic
- Earthy Beads: Add texture and color
These simple steps can transform your miniature dress. Adding rustic details like lace, trim, buttons, and beads will make it a charming piece of home decor.
Stitching And Finishing
Stitching and finishing your miniature rustic dress is the final step in this exciting DIY project. This part will bring your dress to life, adding charm and character to your home decor. Pay attention to the details to achieve a professional look.
Hand Stitching Techniques
Start with basic hand stitching techniques. A simple running stitch is perfect for joining fabric pieces. Use a needle and thread that match your fabric color. Knot your thread at the end to secure it. Push the needle through the fabric, in and out, making small, even stitches.
For more durability, try the backstitch. This stitch creates a solid seam. Insert the needle from the underside of the fabric. Then, go back one stitch length and push the needle through again. Repeat this process for a strong and neat finish.
Final Touches
After stitching, add final touches to your miniature dress. Trim any excess threads carefully. Iron the dress to remove wrinkles and give it a crisp look. Consider adding small embellishments like buttons or lace for extra charm.
Ensure all seams are secure and inspect your work. A well-finished dress will enhance your home decor beautifully. Display your handmade creation proudly, knowing that the effort you put into stitching and finishing has paid off.
Credit: www.etsy.com
Mounting The Dress
Mounting your miniature rustic dress can transform it into a stunning piece of home decor. This section will guide you through the steps to mount your dress effectively, ensuring it stands out beautifully in any space.
Choosing A Frame
Select a frame that complements the rustic style of your miniature dress. Consider using a wooden frame for a natural look. Measure the dress to ensure the frame is the correct size. A frame that is too large or too small can detract from the dress’s charm. If you prefer a more vintage vibe, look for frames with distressed finishes.
| Frame Type | Best For |
|---|---|
| Wooden Frame | Natural, Rustic Look |
| Distressed Frame | Vintage Vibe |
Ensure the frame has a sturdy backing to support the dress. Avoid frames with flimsy materials, as they may not hold the dress securely.
Attaching The Dress
Position the dress in the center of the frame. Use pins or small hooks to secure it. Ensure the dress is flat and even. This will prevent wrinkles or folds from appearing. You can also use double-sided tape for a cleaner look.
- Lay the dress flat on a clean surface.
- Place the frame over the dress to center it.
- Use pins or hooks to attach the dress to the frame backing.
- Ensure the dress is smooth and wrinkle-free.
- Secure the frame backing tightly.
For added stability, consider using a shadow box. This type of frame provides depth and protects the dress from dust and damage.
Once the dress is attached, hang the frame at eye level. This ensures it catches the eye and becomes a focal point in your home decor.
Decorating The Frame
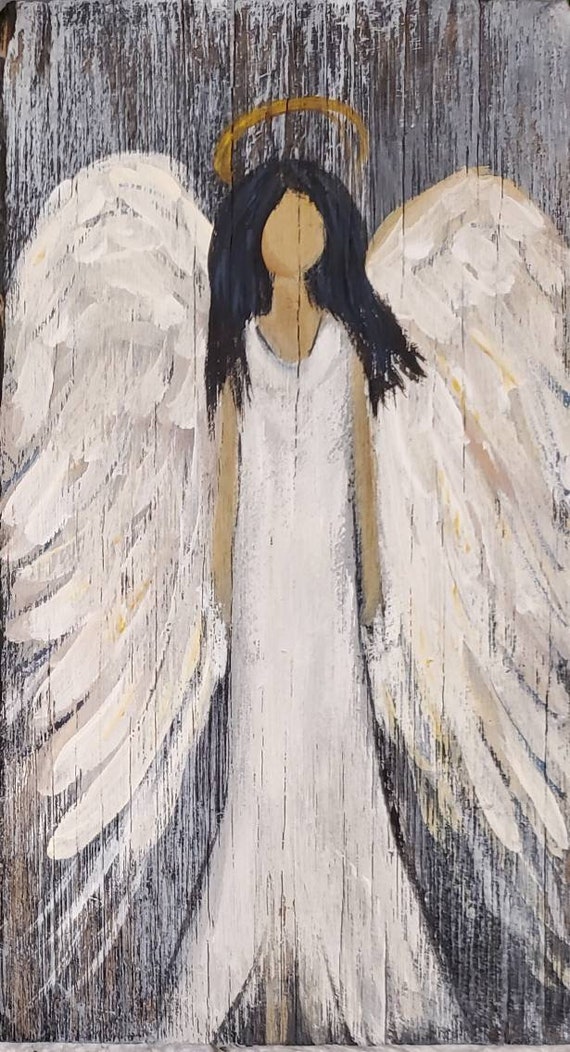
Create a charming miniature rustic dress for home decor using burlap and lace. Add tiny buttons and twine for a cozy, vintage touch. Perfect for enhancing any room with a warm, nostalgic feel.
Creating a miniature rustic dress for home decor can be a fun and rewarding project. One of the key steps is decorating the frame. This is where your creativity comes to life. By painting, staining, and adding embellishments, you can make your miniature dress unique and charming.Painting And Staining
Choose a paint or stain color that matches your decor. For a rustic look, go for earthy tones. Use a small brush for detailed work. Apply the paint or stain evenly. Let it dry completely before adding more layers. You can also mix colors for a distressed look. Lightly sand the surface for a weathered effect.Adding Embellishments
Embellishments add character to your miniature dress. Use lace, ribbons, or small buttons. Glue them carefully to the frame. Ensure they are securely attached. You can also use tiny flowers or leaves. Arrange them in a pleasing pattern. Be creative with your choices. Less is often more, so avoid over-decorating. Each embellishment should enhance the rustic charm. Decorating the frame is an enjoyable part of making a miniature rustic dress. It allows you to express your style. With a bit of effort, your miniature dress will become a lovely piece of home decor. “`Displaying Your Creation
Create a charming miniature rustic dress for home decor. Use simple materials and basic crafting techniques to achieve a vintage look. Display your creation on a small hanger or frame for a cozy touch.
Creating a miniature rustic dress is fun. But the real joy comes from displaying it. This part will bring charm to your home decor. Let’s explore where to place your creation and how to keep it looking great.Finding The Perfect Spot
Choose a spot that gets noticed. A shelf in the living room is a great place. It can also look nice on a side table. Near natural light is best to show off its details. Avoid places with too much moisture. Bathrooms are not ideal. The kitchen might not be best either.Maintenance Tips
Dust your miniature dress weekly. Use a soft brush or cloth. Keep it away from direct sunlight. Sunlight can fade its colors. Check for any loose parts. Fix them right away to keep it looking neat. If it’s made of fabric, avoid wet cleaning. Use a dry method to clean it. “`Conclusion
Creating a miniature rustic dress for home decor is truly rewarding. It adds charm and a personal touch to any space. Simple materials and easy steps make it accessible for everyone. Crafting this piece can be a fun, relaxing activity.
Show off your creativity and impress your guests. Follow the steps, and you’ll have a beautiful decor item. Enjoy the process and the result. Happy crafting!
