How to Make a DIY Christmas Wreath for Home Decoration: Step-by-Step Guide
Making a DIY Christmas wreath is simple and fun. You can create a beautiful decoration for your home with just a few materials.
Christmas wreaths add a festive touch to any home. They are perfect for doors, windows, or walls. Creating your own wreath allows you to personalize it with your favorite colors and themes. Plus, it’s a great way to spend time with family or friends.
In this guide, you will learn easy steps to make a stunning DIY Christmas wreath. Follow along to add a personal and unique decoration to your holiday home.
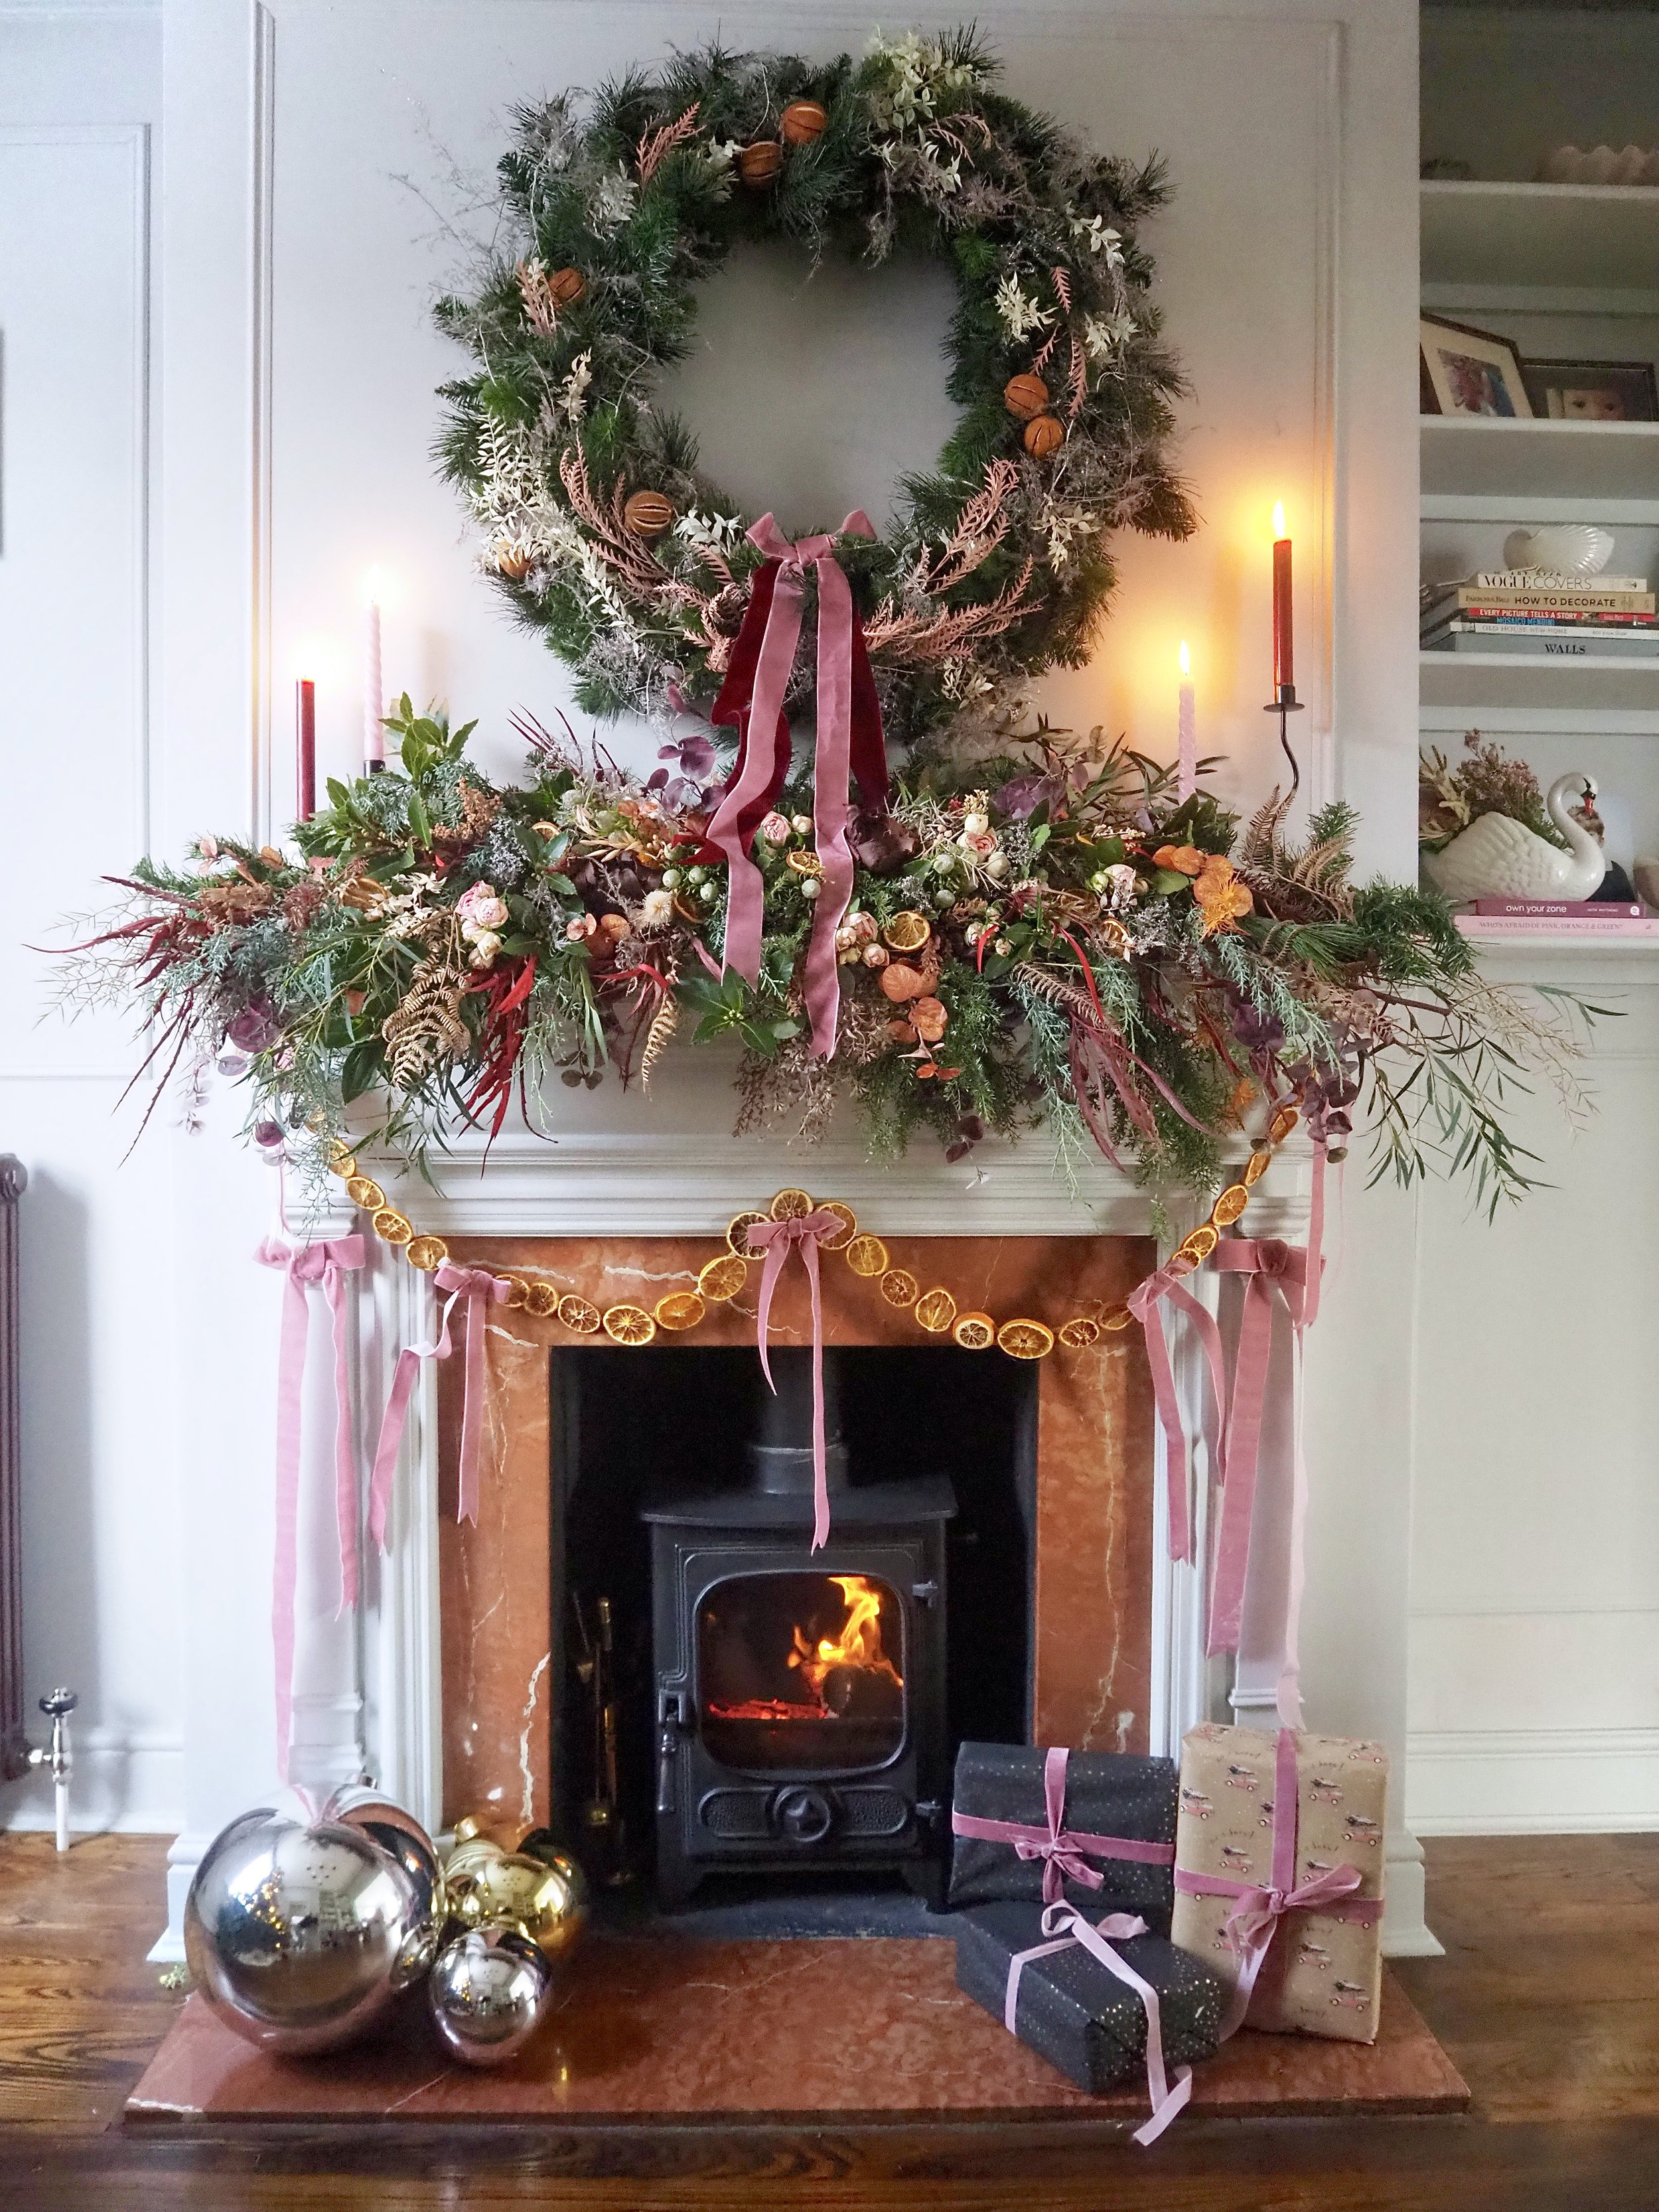
Credit: www.melanielissackinteriors.com
Materials Needed
Creating your own DIY Christmas wreath is a wonderful way to add a personal touch to your holiday decorations. To get started on this festive project, you’ll need a few essential materials. Let’s break down what you’ll need into two categories: basic supplies and optional decorations.
Basic Supplies
First, you’ll need a wreath form. This can be made of foam, wire, or grapevine. A glue gun is essential for attaching decorations securely. Floral wire is also necessary for securing larger items. Don’t forget a pair of scissors for cutting materials. Finally, gather some greenery. You can use pine branches, holly, or any other festive foliage.
Optional Decorations
To make your wreath truly unique, consider adding some optional decorations. Ribbons and bows add a festive touch. Ornaments can provide color and sparkle. Pinecones give a natural look. You might also want to include berries for a pop of color. Finally, small Christmas lights can make your wreath shine, especially in the evening.

Credit: eccentricitiesbyjvg.com
Choosing A Wreath Base
Choosing a wreath base is the first step in creating a beautiful DIY Christmas wreath. The base forms the foundation of your wreath and determines its shape and stability. You can find various types of wreath bases, each with its own benefits and drawbacks.
Types Of Bases
There are several common types of wreath bases available. These include wire, foam, grapevine, and straw bases. Each type provides a unique look and feel to your wreath.
Wire Bases
Wire bases are popular for their flexibility and durability. They are easy to shape and perfect for holding various decorations.
Foam Bases
Foam bases are lightweight and easy to work with. They allow you to insert decorations directly into the foam, making it simple to create a full and lush wreath.
Grapevine Bases
Grapevine bases offer a natural, rustic look. They are sturdy and provide a great surface for attaching decorations with wire or hot glue.
Straw Bases
Straw bases are another natural option. They are easy to work with and provide a solid foundation for your wreath decorations.
Pros And Cons
Each wreath base type has its pros and cons. Wire bases are durable but may require more effort to cover completely. Foam bases are easy to use but can be less sturdy. Grapevine bases look great but may be harder to attach decorations to. Straw bases are simple to work with but can be messy.
Consider these factors when choosing your wreath base. This will help you create the perfect DIY Christmas wreath for your home.
Preparing The Base
Start by gathering materials like a wreath frame, floral wire, and greenery. Secure the greenery around the frame evenly.
Preparing the base for your DIY Christmas wreath is a crucial step. A strong base ensures your wreath looks beautiful and lasts throughout the season. Follow these steps to create a sturdy and attractive base for your wreath.Cleaning And Shaping
Start by gathering your materials. You’ll need a wire wreath frame, fresh greenery, and a pair of garden shears. Choose sturdy branches like pine, fir, or holly. These will hold their shape well. Next, clean the branches. Remove any dirt, leaves, or debris. This will help your wreath look neat and tidy. Trim the branches to your desired length. Aim for pieces about 6-8 inches long. Shape the branches to fit the wreath frame. Bend them gently to create a natural curve. This will help the branches lie flat against the frame.Attaching The Base
Now, it’s time to attach the branches to the wreath frame. Start by placing a branch on the frame. Secure it with floral wire. Wrap the wire tightly around both the branch and the frame. Repeat this process, overlapping the branches slightly. Continue adding branches until the entire frame is covered. Make sure there are no gaps. This will ensure your wreath looks full and lush. Once all the branches are attached, give the wreath a final check. Make sure everything is secure and evenly distributed. Your base is now ready for decorating. “`Selecting Greenery
Creating a DIY Christmas wreath is a delightful way to bring holiday cheer into your home. One of the most important steps in this process is selecting greenery. The greenery you choose sets the tone for your wreath, whether it’s fresh, fragrant pine or long-lasting artificial leaves. Let’s dive into the options available and the best types of greenery for your festive project.
Fresh Vs. Artificial
When deciding between fresh and artificial greenery, consider the pros and cons of each. Fresh greenery offers a natural look and a wonderful scent. It can include pine, holly, and eucalyptus.
On the other hand, artificial greenery is reusable and requires less maintenance. It often looks just as realistic as the real thing and can be found in various styles and colors.
| Type | Pros | Cons |
|---|---|---|
| Fresh Greenery |
|
|
| Artificial Greenery |
|
|
Best Types Of Greenery
Choosing the best types of greenery for your wreath can make all the difference. Here are a few top choices:
- Pine: Classic and fragrant, perfect for a traditional look.
- Holly: Adds a pop of color with its bright red berries.
- Eucalyptus: Offers a modern touch and a pleasant aroma.
- Cedar: Known for its long-lasting freshness and unique texture.
- Fir: Dense and sturdy, great for a fuller wreath.
Mix and match these types of greenery to create a unique and beautiful wreath. Remember to consider your home’s decor and personal style when selecting your greenery. Happy wreath-making!
Assembling The Wreath
Assembling the wreath is the most exciting part of making a DIY Christmas wreath. This is where your creativity shines. You start to see your vision come to life. Let’s break it down into simple steps. First, we will attach the greenery. Then, we will secure everything with wire.
Attaching Greenery
Begin by selecting your base greenery. Common choices include pine, fir, and holly. Cut the branches into smaller pieces. This makes them easier to work with. Arrange the first piece on the wreath base. Use floral wire to secure it. Wrap the wire around the stem and the base tightly.
Continue adding more pieces of greenery. Overlap each piece slightly with the previous one. This creates a full and lush look. Make sure to cover the entire base. Keep the greenery in the same direction for a uniform appearance.
Here are some tips:
- Use a mix of different greens for texture.
- Alternate the lengths of the branches.
- Fill any gaps with small sprigs.
Securing With Wire
Once all the greenery is attached, it’s time to secure everything. Use floral wire to ensure the branches stay in place. Cut a long piece of wire. Start at the back of the wreath. Wrap it around the entire wreath. Make sure to keep it tight but not too tight.
Focus on areas where branches seem loose. Twist the wire around these spots. This helps to keep the shape of the wreath. Continue wrapping until you feel the wreath is secure. Cut off any excess wire. Tuck the ends into the wreath base to hide them.
Here’s a quick checklist:
- Check for loose branches.
- Wrap wire around loose spots.
- Ensure the wreath maintains its shape.
- Trim and tuck wire ends.
Now your base is ready. You can add other decorations like berries, pinecones, or ribbons. Enjoy your beautiful DIY Christmas wreath!
Adding Decorations
Adding decorations to your DIY Christmas wreath can make it truly unique. By carefully selecting and placing ornaments, ribbons, and bows, you can create a festive wreath that reflects your personal style. Let’s dive into the details of how to add these elements to your wreath.
Choosing Ornaments
Ornaments bring color and charm to your wreath. Start by gathering a variety of ornaments in different shapes and sizes. Consider traditional Christmas colors like red, green, gold, and silver. Mix in some unique pieces to add character. Small bells, mini candy canes, and snowflakes work well. Make sure the ornaments are lightweight to avoid weighing down the wreath.
| Ornament Type | Suitable Colors |
|---|---|
| Baubles | Red, Gold, Silver |
| Bells | Gold, Silver |
| Mini Candy Canes | Red, White |
| Snowflakes | White, Blue |
Placing Ribbons And Bows
Ribbons and bows add elegance to your wreath. Start with a wide ribbon in a complementary color. Wrap it around the wreath, ensuring it is evenly spaced. Secure the ribbon with floral wire or hot glue. Add bows at intervals for a festive touch. You can make your own bows or buy pre-made ones. Experiment with different ribbon textures like satin, velvet, or burlap for a unique look.
- Choose a wide ribbon in a complementary color.
- Wrap the ribbon around the wreath evenly.
- Secure the ribbon with floral wire or hot glue.
- Add bows at regular intervals.
- Experiment with different ribbon textures.
With these tips, your DIY Christmas wreath will stand out. Happy decorating!
Final Touches
After crafting your DIY Christmas wreath, it’s time to add the final touches. These last steps will make your wreath look polished and professional. Ensure everything is secure and balanced for a stunning display.
Adjusting For Balance
Balance is key for a beautiful wreath. Hang your wreath to check for any uneven spots. Step back and look at it from different angles. Make sure the decorations are evenly distributed. You don’t want one side to look heavier than the other.
If you notice any imbalance, adjust the decorations. Move items around until the wreath looks symmetrical. Sometimes, adding a small ornament or bow can help achieve this balance.
Securing Loose Ends
Check for any loose ends. This includes ribbon, twine, or hanging wires. Use a hot glue gun to secure anything that seems loose. Wrap wire around the base of any fragile decorations to keep them in place.
You can also tie a sturdy knot at the back of the wreath. This will ensure that all elements stay secure. A well-secured wreath will last through the holiday season without falling apart.
Finally, give your wreath a gentle shake. This will test the security of your decorations. If anything falls off, re-secure it with glue or wire. Now your DIY Christmas wreath is ready to hang and enjoy!
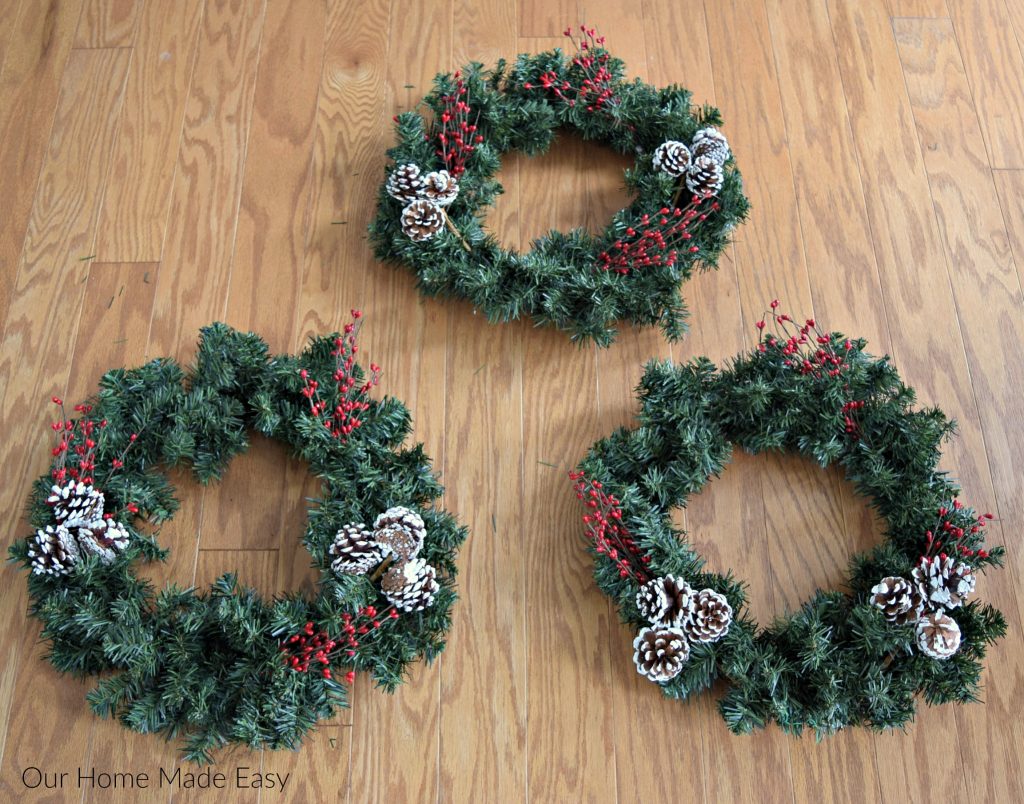
Credit: www.ourhomemadeeasy.com
Displaying Your Wreath
Displaying your wreath is the final step to making your DIY project shine. Where and how you hang it can make a big difference. The right spot and method can enhance your home’s festive look. Let’s explore some techniques and tips to display your wreath effectively.
Hanging Techniques
Start by choosing a sturdy hook or nail. Command hooks are great for doors and walls. Use a ribbon to hang your wreath for added charm. Loop the ribbon through the wreath and secure it with a knot. Then hang the ribbon on the hook or nail.
For a door, you might prefer an over-the-door hanger. These hangers are easy to use and don’t damage the surface. Make sure the hanger is strong enough to hold your wreath. If you want to avoid hooks or nails, try using a suction cup hook. These work well on glass or smooth surfaces.
Indoor Vs. Outdoor Display
Consider where you want to display your wreath. Indoor displays protect your wreath from weather and wear. Hang it on a door, above a fireplace, or in a window. Make sure it complements your interior decor.
Outdoor displays can greet guests with holiday cheer. Choose a spot like your front door or porch. Ensure your wreath is weatherproof to withstand the elements. If your wreath has delicate materials, keep it sheltered from rain and snow. You can also use a protective spray to help it last longer.
Remember to secure your wreath well, both indoors and outdoors. Strong winds can dislodge an outdoor wreath. Use extra hooks or ribbons if needed. With the right display, your DIY wreath will be a beautiful addition to your festive decor.
Conclusion
Creating a DIY Christmas wreath is fun and rewarding. You get to personalize it. Use materials from around your home. Save money while adding a personal touch. Friends and family will admire your creativity. The process is simple and enjoyable.
Perfect for a weekend project. Your home will feel festive and welcoming. Start your DIY wreath today. Enjoy the holiday spirit in your own unique style. Happy crafting and Merry Christmas!


