How to Make a Decorative Candle in Home: Step-by-Step Guide
Making decorative candles at home is a fun and creative activity. It adds a personal touch to your decor and makes great gifts.
Creating decorative candles at home is easier than you think. With some basic materials and a bit of patience, you can craft beautiful candles. This guide will walk you through the steps, making the process simple and enjoyable. Whether you want to add ambiance to your living space or create a unique gift, homemade candles are perfect.
You’ll learn how to choose the right wax, wicks, and molds. Plus, we’ll cover techniques for adding colors, scents, and decorations. Get ready to dive into the world of candle making and discover how rewarding it can be!

Credit: www.youtube.com
Materials Needed
Creating a decorative candle at home is a delightful project. It is essential to gather all the necessary materials before starting. Below, we will go through the important items you need, categorized by type.
Wax Types
Choosing the right wax is crucial. Here are some common types:
- Paraffin Wax: Affordable and easy to work with.
- Soy Wax: Eco-friendly and burns cleanly.
- Beeswax: Natural and emits a pleasant scent.
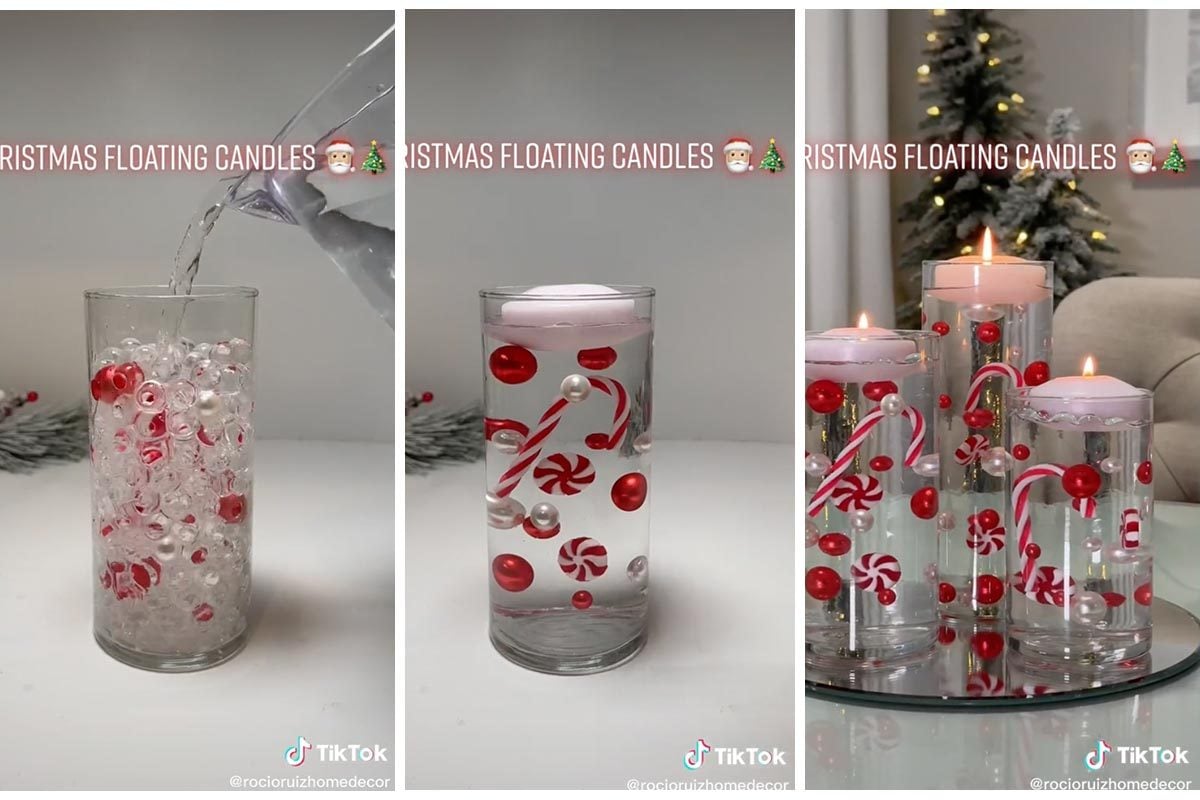
- Gel Wax: Unique and translucent, perfect for decorative candles.
Wicks And Molds
The wick and mold you choose can greatly affect your candle’s look and burn quality.
| Item | Description |
|---|---|
| Cotton Wicks: | Most common, suitable for most wax types. |
| Wooden Wicks: | Create a crackling sound when burning. |
| Molds: | Available in various shapes and sizes, from simple to intricate designs. |
Fragrances And Dyes
Adding fragrance and color can make your candles unique and appealing.
- Essential Oils: Natural and offer various scents.
- Fragrance Oils: Synthetic but provide a wide range of aromas.
- Candle Dyes: Available in liquid, powder, or block form to add color.
Additional Tools
Some extra tools will help you in the candle-making process:
- Double Boiler: For safely melting wax.
- Thermometer: To monitor the wax temperature.
- Pouring Pitcher: For easy handling and pouring of melted wax.
- Stirring Stick: To mix fragrances and dyes evenly.
- Heat Gun: Useful for smoothing out the candle surface.
With these materials and tools, you are ready to start making your own decorative candles at home.
Preparation Steps
Creating a decorative candle at home can be a fun and creative project. To ensure a smooth and enjoyable experience, it’s crucial to prepare properly. Let’s dive into the essential preparation steps that will set you up for success.
Setting Up Workspace
Choose a clean, flat surface for your workspace. A kitchen counter or a sturdy table works well. Cover the area with old newspapers or a disposable tablecloth to catch any spills. Gather all your materials, including wax, wicks, molds, and fragrance oils. Keep everything within arm’s reach to avoid interruptions.
Safety Precautions
Safety is key when working with hot wax. Always work in a well-ventilated area. Wear protective gloves to avoid burns. Keep a fire extinguisher nearby, just in case. Never leave melting wax unattended. Ensure children and pets are kept away from your workspace.
Melting The Wax
Melting the wax is a crucial step in making a decorative candle. It is important to melt the wax safely and efficiently to achieve the best results. There are two popular methods to melt wax at home: the double boiler method and the microwave method. Each method has its benefits and can be easily done with items you probably already have in your kitchen.
Double Boiler Method
The double boiler method involves using two pots. One pot fits inside the other. Fill the larger pot halfway with water and place it on the stove. Bring the water to a simmer. Put the wax in the smaller pot and place it inside the larger pot. Stir the wax occasionally to ensure it melts evenly. This method provides gentle heat, reducing the risk of burning the wax.
Microwave Method
The microwave method is quick and convenient. Use a microwave-safe container to melt the wax. Cut the wax into small pieces to ensure even melting. Set the microwave to a medium heat setting. Heat the wax in 30-second intervals, stirring in between each interval. Continue until the wax is completely melted. Be cautious, as the container can become very hot.

Credit: www.familyhandyman.com
Adding Fragrance And Color
Adding fragrance and color to your homemade candles can enhance their appeal. The right scent and color can make your candles more attractive and enjoyable. Here is how you can add these elements to your candles.
Choosing Scents
Choosing the right scent is essential to making your candles unique. There are many scents to choose from, such as lavender, vanilla, and citrus. You can mix and match different scents to create a unique blend.
- Lavender: Calming and relaxing.
- Vanilla: Sweet and comforting.
- Citrus: Fresh and energizing.
Ensure you use scents that are specifically made for candles. Essential oils and fragrance oils work best. Add the scent to the melted wax before pouring it into the mold.
Mixing Dyes
Mixing dyes into your candle wax is simple. Candle dyes come in liquid, block, and chip forms. Choose the form that works best for you.
| Form | Advantages |
|---|---|
| Liquid | Easy to mix and control the color intensity. |
| Block | Long-lasting and can be shaved to the desired amount. |
| Chip | Pre-measured and easy to use. |
Once you have chosen your dye, add it to the melted wax. Stir well to ensure an even color. Start with a small amount and add more if needed.
Combining fragrance and color makes your candles beautiful and personalized. Experiment with different combinations to find your favorite.
Preparing The Mold
Begin by cleaning the candle mold thoroughly. Ensure it’s dry before spraying it with mold release to avoid sticking.
Making a decorative candle at home is a fun activity. It starts with preparing the mold. This is the base for your candle. Let’s break down the steps to prepare it.Positioning The Wick
First, place the wick in the center of the mold. This ensures the candle burns evenly. Use a pre-waxed wick for best results. It should be longer than the mold’s height. This extra length helps you handle it better.Securing The Wick
Next, secure the wick at the bottom of the mold. A dab of hot glue works well. Press the wick’s metal tab into the glue. Hold it until the glue cools. This keeps the wick in place. To keep the wick straight, tie it to a pencil. Lay the pencil across the top of the mold. This prevents the wick from bending. Now your mold is ready for the wax. “`
Credit: www.amazon.com
Pouring The Wax
Pouring the wax is a crucial step in making a decorative candle at home. This step ensures your candle sets well, looks beautiful, and burns evenly. Careful attention to detail is necessary to avoid common mistakes. Let’s explore the best techniques for pouring wax and avoiding air bubbles.
Pouring Techniques
Using the right pouring technique can greatly enhance the appearance of your candle. Here are some tips:
- Melt the wax: Ensure the wax is completely melted before pouring.
- Check the temperature: The ideal pouring temperature is usually between 120°F to 140°F. Check the wax package for specifics.
- Pour slowly: Pouring the wax slowly helps to avoid splashing and forming bubbles.
- Use a spouted container: This helps to control the flow of wax and reduces spills.
Avoiding Air Bubbles
Air bubbles can ruin the look of your candle. Here are some ways to avoid them:
- Preheat the container: Warm your candle container in the oven (set to low) before pouring the wax.
- Stir gently: Stir the melted wax slowly and consistently to avoid air bubbles.
- Tap the container: After pouring, gently tap the sides of the container to release any trapped air.
- Cool gradually: Let the candle cool at room temperature. Rapid cooling can cause cracks and air pockets.
Remember, the key to a beautiful decorative candle is patience and attention to detail during the pouring process.
Cooling And Setting
Creating decorative candles at home can be a fun and rewarding project. One of the most important steps is the cooling and setting process. This step ensures your candle takes its final shape and remains durable. Let’s dive into the details of cooling time and removing from the mold.
Cooling Time
The cooling time is crucial for a perfect candle. Allow the candle to cool slowly at room temperature. Quick cooling can cause cracks or imperfections. Usually, it takes about 4 to 6 hours for a small candle to cool completely. For larger candles, it may take up to 24 hours.
To check if your candle is ready, touch the mold lightly. If it feels cool and firm, it’s ready for the next step. Ensure the candle is fully cooled before trying to remove it from the mold.
Removing From Mold
Removing the candle from the mold requires patience. Gently pull the sides of the mold away from the candle. This helps to loosen it. Then, slowly and carefully, push the bottom of the mold to release the candle.
If the candle sticks, place the mold in the freezer for 10 minutes. The candle will contract slightly, making it easier to remove. Once out, trim the wick to about 1/4 inch. Your decorative candle is now ready for display or use!
Decorating The Candle
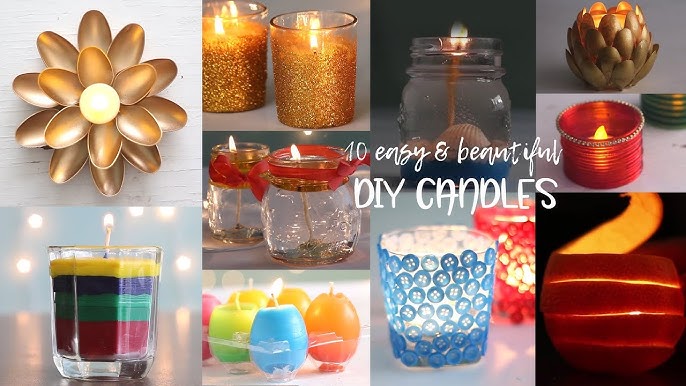
Decorating your handmade candle makes it unique and special. You can use various techniques to decorate it. These techniques can include painting, adding embellishments, or even labels. Let’s explore some of these methods in detail.
Painting And Embellishments
Painting your candle is a fun way to add color and personality. You can use acrylic paint, which works well on wax. Make sure to clean the candle surface before painting. This helps the paint stick better.
Here are some tips for painting your candle:
- Use a thin brush for detailed designs.
- Let each layer dry before adding another.
- Seal the paint with a clear wax sealant.
Embellishments can further enhance your candle. You can use beads, glitter, or small charms. Attach these with a hot glue gun. Be careful not to overdo it. Too many embellishments can be overwhelming.
| Embellishments | Use |
|---|---|
| Beads | Stick around the candle base or top |
| Glitter | Sprinkle on wet paint for a sparkling effect |
| Charms | Glue small charms for a decorative touch |
Adding Labels
Labels can make your candle look professional. You can print custom labels or handwrite them. Include the candle’s scent, ingredients, or a special message.
Here is how you can add labels:
- Design your label on a computer or by hand.
- Print it on sticker paper or use a label maker.
- Cut out the label neatly.
- Stick it onto the candle, ensuring it is straight.
Labels not only add a personal touch but also provide useful information. They can make your candle a perfect gift.
Maintenance Tips
Maintaining your decorative candle ensures it lasts longer and stays beautiful. Proper care involves following burning guidelines and storing candles correctly. Let’s dive into these essential tips.
Burning Guidelines
Proper burning techniques are crucial for candle longevity and safety. Follow these guidelines:
- Trim the wick: Always trim the wick to 1/4 inch before each use. This prevents excessive smoke and soot.
- Burn for 2-3 hours: Allow the candle to burn for 2-3 hours during each use. This helps the wax melt evenly, preventing tunneling.
- Keep away from drafts: Place your candle in a draft-free area. Drafts can cause uneven burning and dripping.
- Use a candle holder: Always use a proper candle holder to catch any drips and protect surfaces.
- Extinguish safely: Use a snuffer to extinguish the flame. Blowing can cause hot wax splatter.
Storing Candles
Proper storage ensures your candles remain fresh and functional. Consider these tips:
| Storage Method | Reason |
|---|---|
| Cool, dry place | Prevents melting and maintains shape. |
| Away from sunlight | Sunlight can fade colors and weaken the scent. |
| Seal in a bag | Preserves the fragrance and protects from dust. |
| Store upright | Maintains the shape and prevents deformation. |
Using these storage tips will help keep your candles in top condition. Enjoy your beautifully maintained decorative candles!
Conclusion
Creating decorative candles at home is fun and rewarding. You can customize them to match your style. The process is simple, requiring basic materials and tools. Plus, it’s a great way to relax and get creative. Handmade candles make perfect gifts for loved ones.
They add warmth and a personal touch to any space. Try different colors, scents, and designs to keep it exciting. Now, gather your materials and start crafting your unique decorative candle today. Enjoy the process and the beautiful results!


