How to Make Edible Cake Decorations at Home: Easy Tips & Tricks
Making edible cake decorations at home is simple and fun. You don’t need to be a professional baker to create stunning, tasty designs.
Imagine impressing your friends and family with a beautifully decorated cake that you made entirely on your own. Edible cake decorations add a personal touch to any cake, making your dessert not just delicious, but also visually appealing. Whether it’s a birthday, anniversary, or just a special treat, homemade decorations can elevate your cake to the next level.
In this blog post, we will guide you through the basics of creating edible cake decorations at home. You’ll learn about easy-to-find ingredients, simple techniques, and a few tips to make your designs truly stand out. Ready to get creative in your kitchen? Let’s dive in!
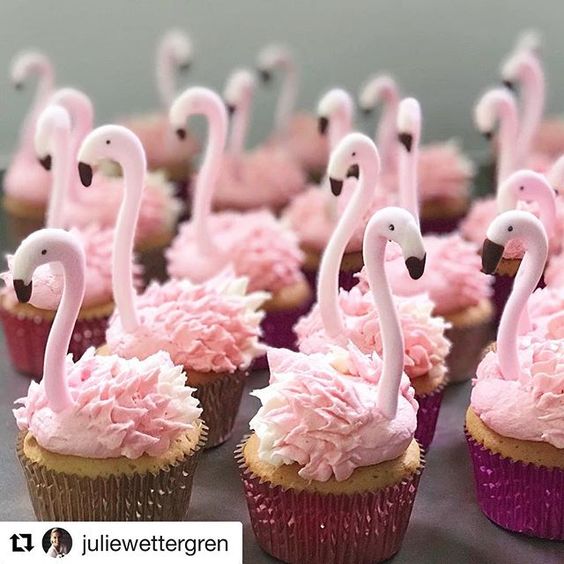
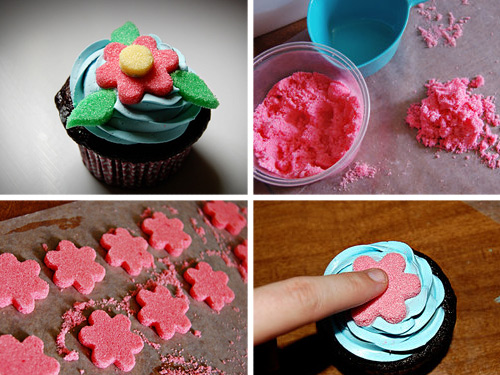
Credit: delightanddazzle.com
Introduction To Edible Cake Decorations
Decorating cakes with edible decorations is a fun and creative activity. It adds a touch of personal flair to any cake. Edible decorations can transform a simple cake into a work of art. They are made from materials that are safe to eat. You can create beautiful and tasty designs right in your kitchen.
Importance Of Cake Decorations
Decorating cakes enhances their appearance. It makes them more appealing. A well-decorated cake can impress guests at any event. It shows effort and care in preparation. Beautiful decorations can also make cakes more memorable. People often remember cakes with unique designs.
Edible decorations also add to the overall experience. They offer a complete sensory delight. From the look to the taste, everything matters. Decorations can reflect the theme of an event. Birthdays, weddings, and holidays all have different styles. Each decoration can tell a story.
Benefits Of Homemade Decorations
Creating decorations at home allows for personalization. You can match the cake to the event perfectly. Homemade decorations also ensure the use of fresh ingredients. This can make them healthier and tastier.
Another benefit is the cost. Making decorations at home is often cheaper. You save money and get to enjoy the process. It can be a fun family activity. Kids love to help with cake decorating.
Homemade decorations also offer a sense of accomplishment. Seeing your work on display is rewarding. It makes the cake more special. Guests will appreciate the effort put into making it unique.
Essential Tools And Ingredients
Creating edible cake decorations at home can be a fun and rewarding activity. You need the right tools and ingredients to get started. These essentials will help you craft beautiful and tasty decorations. Whether you are a beginner or have some experience, having the right supplies will make the process smoother.
Basic Tools For Beginners
Start with a few basic tools. A rolling pin is essential for flattening fondant or gum paste. Use cookie cutters to shape your decorations. Different sizes and shapes add variety. Toothpicks help in detailing and adding texture. A small knife or pizza cutter assists in cutting shapes.
Brushes are useful for painting and adding shimmer. You will need a silicone mat for rolling out fondant. It prevents sticking and makes cleanup easy. Lastly, invest in a set of piping bags and tips. They allow you to create intricate designs with icing.
Common Ingredients To Have
Stock up on some common ingredients. Fondant is a must for smooth, pliable decorations. Gum paste is another versatile option. It hardens quickly, ideal for flowers and figures. Food coloring adds vibrancy to your creations. Gel or paste colors work best.
Edible glitter and shimmer dust add sparkle. Royal icing is perfect for detailed piping work. It’s strong and dries hard. Cornstarch prevents sticking when working with fondant. Finally, have some edible glue or clear piping gel handy. It helps attach decorations securely.
Fondant Decorations
Fondant decorations can transform a simple cake into a masterpiece. These smooth, pliable decorations allow for creativity and precision. Whether it’s for a birthday, wedding, or any special occasion, fondant decorations add a professional touch. Let’s explore how to make fondant from scratch and the techniques to shape and color it.
Making Fondant From Scratch
Creating fondant at home is simpler than you think. Start with basic ingredients like powdered sugar, gelatin, water, and corn syrup. Mix the gelatin and water in a bowl. Let it sit until it becomes gelatinous. Then, heat it in a microwave until melted. Add corn syrup and glycerin, stirring until smooth.
Gradually add powdered sugar to the mixture. Knead it until it forms a dough-like consistency. If it’s too sticky, add more powdered sugar. If it’s too dry, add a few drops of water. Once smooth and pliable, wrap it in plastic wrap. Let it rest for a few hours before using.
Shaping And Coloring Techniques
Shaping fondant requires a clean, flat surface and a rolling pin. Dust the surface with powdered sugar to prevent sticking. Roll out the fondant to your desired thickness. Use cookie cutters or a knife to cut out shapes. Molds can also create intricate designs.
For coloring, use gel food colors. They provide vibrant hues without changing the fondant’s texture. Wear gloves to avoid staining your hands. Add a small amount of color to the fondant. Knead it until the color is evenly distributed. For multiple colors, divide the fondant and repeat the process.
With these techniques, you can create stunning fondant decorations. Your cakes will look professional and impress your guests.
Buttercream Flowers
Buttercream flowers can elevate the look of any homemade cake. They add elegance and charm. Making them at home is easier than you might think. With a few tools and some patience, you can create stunning decorations. Let’s dive into the basics.
Creating Buttercream Icing
First, you need to make the buttercream icing. Use unsalted butter at room temperature. Cream it until smooth and fluffy. Gradually add powdered sugar. Mix until fully combined. Add a few drops of vanilla extract for flavor. If the mixture is too thick, add a bit of milk. Your buttercream should be thick but spreadable.
Piping Techniques For Flowers
Next, you’ll need a piping bag and some tips. Use a petal tip for roses. Fill your piping bag with the prepared buttercream. Hold the bag at a 45-degree angle. Start from the center and work your way out. Use gentle pressure to form petals. For daisies, use a star tip. Pipe short lines from the center outwards. Practice on parchment paper before decorating your cake.
Remember, practice makes perfect. The more you pipe, the better your flowers will look. Soon, you’ll be decorating cakes like a pro!
Chocolate Decorations
Creating chocolate decorations for your cake can elevate its appearance and taste. These decorations are easy to make at home and add a professional touch. Let’s dive into the process of making chocolate decorations with simple steps.
Melting And Tempering Chocolate
Start by choosing high-quality chocolate. Break it into small pieces for even melting.
- Use a double boiler or a microwave.
- For a double boiler, place chocolate in a heatproof bowl.
- Set the bowl over simmering water, stirring until melted.
- If using a microwave, heat in short bursts, stirring frequently.
Tempering chocolate ensures a smooth and glossy finish. Here’s how:
- Melt two-thirds of the chocolate.
- Remove from heat and add the remaining one-third.
- Stir until all the chocolate melts and reaches 88-90°F (31-32°C).
Creating Shapes And Designs
Once your chocolate is tempered, it’s time to create shapes. Use parchment paper or silicone molds for this.
- Pour the chocolate onto parchment paper.
- Spread it thinly with a spatula.
- Let it cool slightly but not harden completely.
For intricate designs, use a piping bag or a small plastic bag with a snipped corner.
| Shape | Tool |
|---|---|
| Hearts, stars | Cookie cutters |
| Swirls, letters | Piping bag |
| Leaves, flowers | Silicone molds |
Allow the chocolate shapes to set at room temperature or in the fridge. Once hardened, they are ready to decorate your cake.
Sugar Art And Isomalt
Creating edible decorations can transform a plain cake into a masterpiece. Sugar art and isomalt are two popular techniques for making stunning cake decorations. With a bit of practice, you can make intricate flowers, figurines, and other shapes.
Working With Sugar And Isomalt
Sugar is a common ingredient in cake decorations. It can be melted and shaped into various designs. Isomalt is a sugar substitute that is easier to work with. It holds up better in humid conditions.
- Heat sugar or isomalt to 320°F (160°C).
- Use a candy thermometer for accuracy.
- Pour the melted mixture onto a silicone mat.
- Let it cool slightly before shaping.
Making Sugar Flowers And Figurines
Creating sugar flowers requires patience and practice. Start with simple shapes and work your way up.
- Roll out a thin sheet of sugar or isomalt.
- Cut out petal shapes using a cookie cutter.
- Shape the petals by hand or with tools.
- Attach the petals together using melted sugar.
Sugar figurines can add a playful touch to any cake. They are perfect for themed parties.
- Mold basic shapes by hand.
- Use food coloring to add details.
- Attach parts using melted sugar.
By mastering these techniques, you can create beautiful and unique cake decorations at home.
Using Fresh Fruits And Edible Flowers
Transform your cakes with beautiful and tasty decorations made from fresh fruits and edible flowers. These natural elements add vibrant colors and flavors to your homemade creations. Follow these simple steps to make your cakes look and taste amazing.
Selecting The Best Fruits
Choose fruits that are ripe and fresh. They should be in season for the best taste. Here are some popular options:
- Strawberries
- Blueberries
- Raspberries
- Kiwi
- Mango
Wash the fruits thoroughly to remove any dirt or pesticides. Slice them into thin, even pieces for easy placement on your cake. Arrange them in patterns or scatter them for a more natural look.
Preparing Edible Flowers
Select organic edible flowers to avoid chemicals. Some popular choices are:
- Roses
- Violets
- Pansies
- Marigolds
- Lavender
Rinse the flowers gently under cold water. Pat them dry with a soft towel. Remove any stems or leaves that you don’t want on your cake. Place the flowers on your cake just before serving to keep them fresh.
For an extra touch, lightly brush the flowers with egg white and sprinkle with sugar. This will give them a beautiful, frosted look and a sweet taste.
Use fresh fruits and edible flowers to create stunning cake decorations. Your cakes will not only look beautiful, but also taste delicious.
Storage And Preservation
Store and preserve edible cake decorations in an airtight container. Keep them in a cool, dry place to maintain freshness.
Making edible cake decorations at home is fun. But, you must store and preserve them properly. This ensures they stay fresh and ready to use. Let’s explore the best ways to store and preserve your homemade cake decorations.Proper Storage Techniques
Proper storage keeps your decorations in great shape. Store sugar decorations in an airtight container. This prevents moisture from ruining them. Place the container in a cool, dry place. Avoid direct sunlight. Sunlight can cause colors to fade. Chocolate decorations need special care too. Keep them in a cool place, but not in the fridge. The fridge can cause condensation. This makes chocolate decorations sticky. Use parchment paper between layers to avoid sticking. Gum paste and fondant decorations dry out easily. Wrap them in plastic wrap. Then place them in an airtight container. This keeps them soft and flexible. If they harden, they might crack when used.Preserving The Freshness Of Decorations
Preserving freshness is key to maintaining quality. Edible decorations can last weeks if stored right. Check them regularly for any signs of spoilage. For sugar and chocolate decorations, ensure they stay dry. Moisture can ruin their texture. Fondant and gum paste need to stay soft. If they start to dry, use a damp cloth to cover them. This helps retain moisture. Do not soak them. Just keep them slightly damp. Add a bit of vegetable shortening to fondant to keep it pliable. Use silica gel packets for added protection. Place one in the container with your decorations. It absorbs moisture and keeps decorations dry. Replace packets regularly to ensure effectiveness. These storage and preservation tips help maintain your edible decorations. Enjoy creating beautiful, fresh decorations for your cakes. “`Creative Ideas For Different Occasions
Creating edible cake decorations at home can be fun. It allows you to personalize cakes for different occasions. From birthdays to weddings, there are endless creative ideas to explore. Let’s dive into some exciting decoration ideas for various celebrations.
Birthday Cake Decorations
Birthday cakes are a centerpiece of any celebration. Here are some ideas to make them special:
- Sprinkles and Candy: Use colorful sprinkles and candy to add a pop of color.
- Fondant Shapes: Create stars, hearts, or numbers with fondant.
- Edible Glitter: Sprinkle some edible glitter for a magical touch.
- Fruit Toppings: Fresh fruits like strawberries, blueberries, and kiwis add freshness and color.
- Chocolate Shavings: Grate some chocolate for a rich, elegant look.
Wedding Cake Ideas
Wedding cakes are often grand and elegant. Here are some ideas to make them memorable:
- Edible Flowers: Use edible flowers like roses, pansies, and violets for a romantic touch.
- Gold Leaf: Add gold leaf accents to give the cake a luxurious feel.
- Lace Patterns: Create delicate lace patterns using royal icing.
- Monogram Toppers: Craft monogram toppers using fondant or chocolate.
- Fruit and Nuts: Decorate with fruits like figs and nuts for a rustic charm.
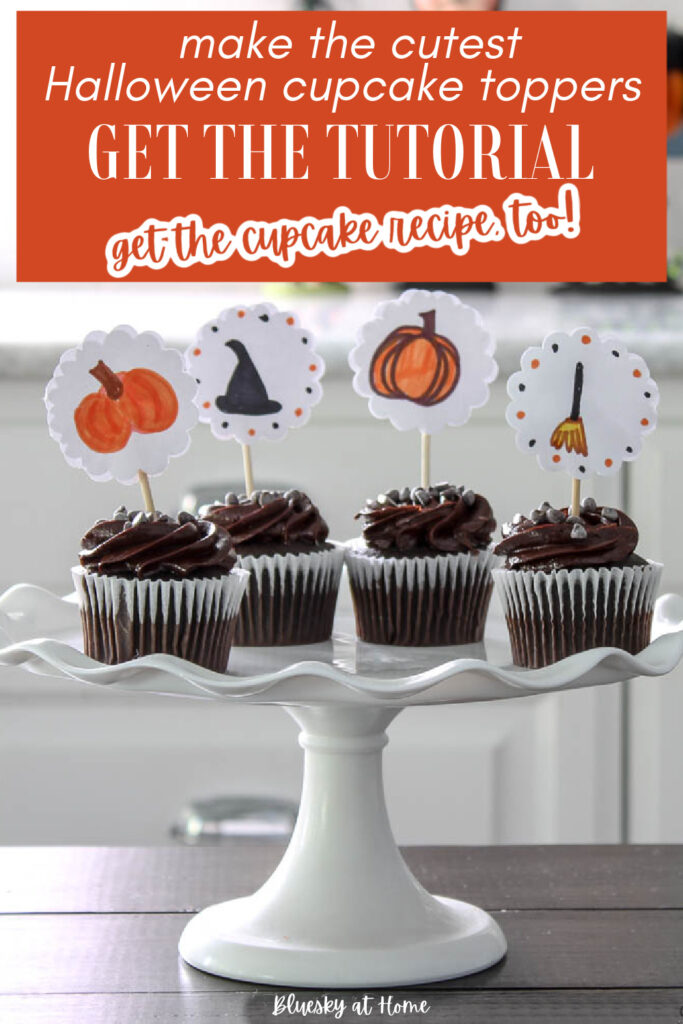
Credit: blueskyathome.com
Troubleshooting Common Issues
Creating edible cake decorations at home can be fun and rewarding. But sometimes, things don’t go as planned. In this section, we’ll explore common issues and how to fix them. Let’s make sure your cake decorations look perfect every time!
Fixing Fondant Cracks
Fondant can crack easily if not handled properly. Here are some tips to fix those cracks:
- Keep fondant moist: Dry fondant cracks quickly. Use a small amount of shortening to keep it soft.
- Work quickly: Fondant dries as you work. Roll it out and cover the cake swiftly.
- Use water: A little water can help smooth out cracks. Apply with a brush or your finger.
- Patch with fresh fondant: For larger cracks, use a small piece of fresh fondant to cover the area.
Dealing With Melting Chocolate
Melting chocolate can be tricky, especially in warm conditions. Follow these tips to handle it better:
- Cool the environment: Work in a cool room. Heat makes chocolate melt too fast.
- Use tempered chocolate: Tempering chocolate helps it stay firm at room temperature.
- Chill your tools: Cool your utensils before using them with chocolate.
- Refrigerate decorations: Place finished decorations in the fridge to set them properly.
By addressing these common issues, you’ll create beautiful and professional-looking cake decorations at home. Happy decorating!

Credit: ultimateomnoms.com
Conclusion
Creating edible cake decorations at home is both fun and rewarding. You can craft unique designs with simple ingredients. Your cakes will look amazing and taste even better. Homemade decorations also save money. Plus, they add a personal touch to your baking.
Start experimenting today. Your creativity is the only limit. Enjoy baking and decorating!
