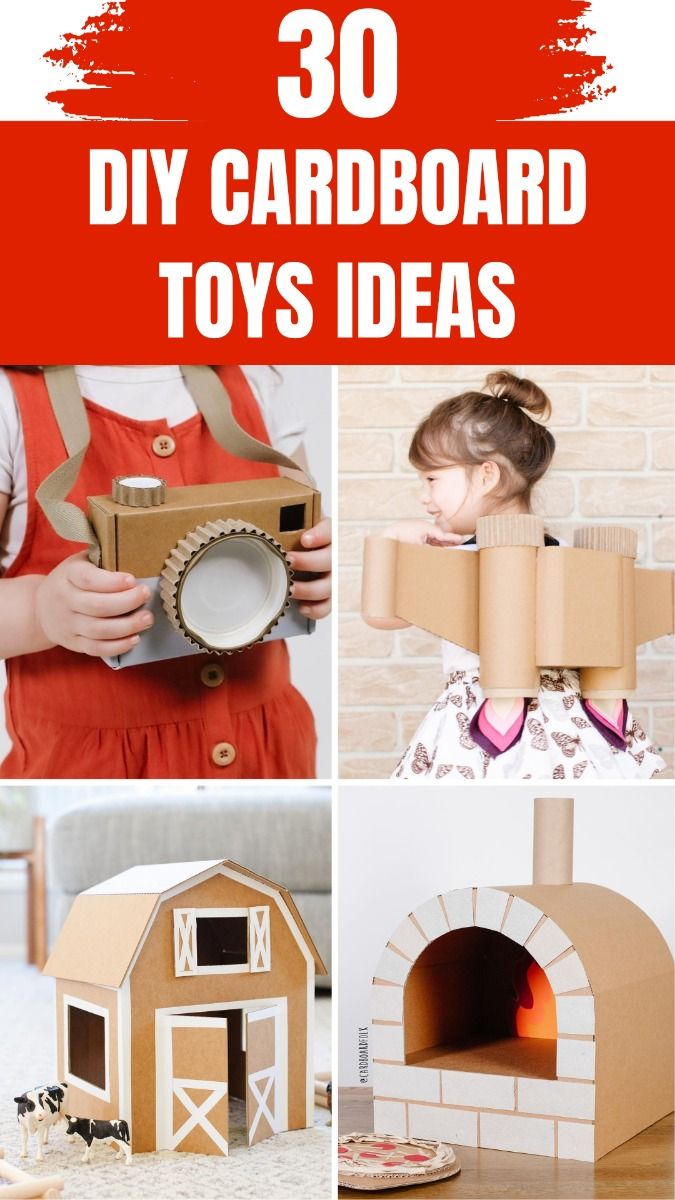
30 DIY Cardboard Toys Ideas: Fun and Creative Projects
DIY cardboard toys are fun and eco-friendly. They are easy to make and cost-effective.
Are you looking for creative ways to entertain your kids while teaching them about recycling? Cardboard toys are the perfect solution. Not only do they provide hours of fun, but they also encourage creativity and resourcefulness. With just a few simple materials, you can transform ordinary cardboard into extraordinary toys.
Plus, it’s a great way to reuse boxes that would otherwise be thrown away. In this blog post, we will explore 30 amazing DIY cardboard toy ideas that you can easily create at home. Get ready to be inspired and start crafting with your kids today!
Introduction To Diy Cardboard Toys
Creating toys from cardboard is an excellent way to spend quality time with children. These projects are not only fun but also encourage creativity and learning. DIY cardboard toys are eco-friendly, cost-effective, and easy to make at home. Let’s explore the world of cardboard toy-making!
Benefits Of Making Cardboard Toys
Making cardboard toys has many advantages. Here are some key benefits:
- Cost-Effective: Cardboard is cheap and often available for free.
- Eco-Friendly: Reusing cardboard reduces waste and helps the environment.
- Creativity Boost: Children can design and customize their own toys.
- Learning Opportunity: Kids learn about shapes, sizes, and construction.
- Bonding Time: Parents and children can work together on these projects.
Essential Tools And Materials
Before starting, gather the necessary tools and materials. Here’s a simple list:
| Tools | Materials |
|---|---|
| Scissors | Cardboard boxes |
| Utility knife | Markers or paint |
| Ruler | Glue or tape |
| Pencil | Decorative items (stickers, ribbons) |
Having these tools and materials on hand will make your DIY projects smoother and more enjoyable.
With these benefits and tools in mind, let’s dive into some fantastic DIY cardboard toy ideas!
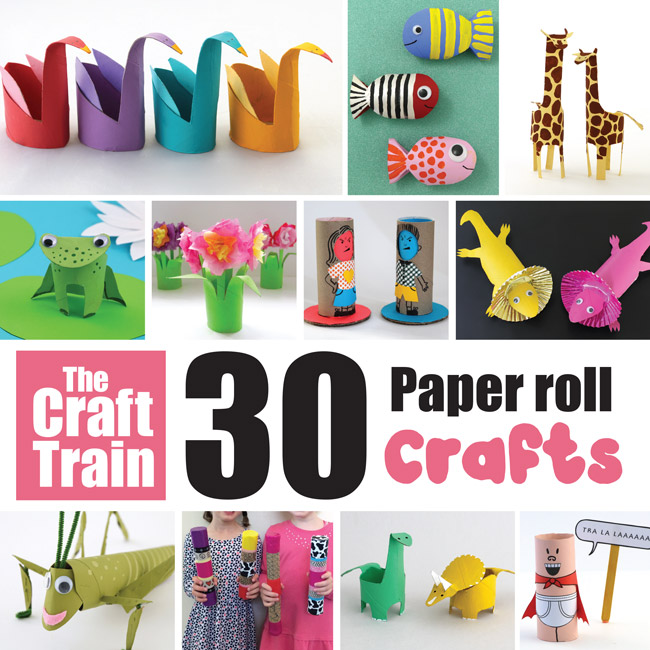
Credit: www.thecrafttrain.com
Cardboard Cars And Trucks
Creating toys from cardboard offers endless possibilities. Kids love cars and trucks. Cardboard makes it easy to craft these vehicles. Plus, it’s eco-friendly and cost-effective. This section explores simple designs and truck creations.
Simple Car Designs
Start with basic shapes. Use rectangles and circles. Cut out pieces for the body and wheels. Glue them together. Add details with markers or paint. Use bottle caps for wheels. Attach them with brads. Your car is ready for play!
Experiment with different shapes. Try adding a roof or spoiler. Use colored paper for a sleek look. Let kids decorate their cars. Personalize with stickers or drawings. This sparks creativity and fun.
Creating A Cardboard Truck
Trucks are slightly more complex. Begin with a large cardboard box. Cut out the cab and trailer sections. Use smaller boxes for details. Attach the cab to the trailer with tape or glue. Add a cargo area in the back.
Use bottle caps or cardboard circles for wheels. Secure them with brads or glue. Decorate the truck with paint or markers. Create a windshield and windows. Add headlights with foil or reflective stickers. Your cardboard truck is complete.
Kids can fill the cargo area with toys. They can pretend to transport goods. This enhances imaginative play. Cardboard trucks provide hours of entertainment. Plus, they are easy to make and customize.
Cardboard Dollhouses
Cardboard dollhouses are a wonderful way to spark creativity in children. They can build, decorate, and play with their own handmade toys. Plus, creating a cardboard dollhouse is a fun and affordable project. Let’s explore how to make a basic dollhouse structure and then add furniture and decorations.
Basic Dollhouse Structure
Start with a sturdy cardboard box. Cut off any flaps to create an open front. This will be the front of your dollhouse. Use a ruler and pencil to draw where you want the rooms to be. Cut out doorways between the rooms. If you want a multi-story dollhouse, use additional cardboard pieces to create floors. Glue or tape these pieces securely. Now, you have a basic dollhouse structure!
Adding Furniture And Decorations
Once the structure is complete, it’s time to add some furniture. Use smaller cardboard pieces to create beds, tables, and chairs. You can also use bottle caps for stools and cotton balls for pillows. Paint or color the furniture to make it more realistic. For decorations, use scraps of fabric to create curtains. Cut out pictures from magazines to make wall art. You can also add small pieces of paper or cardboard to create rugs and other decorative items. This will make the dollhouse feel cozy and complete.
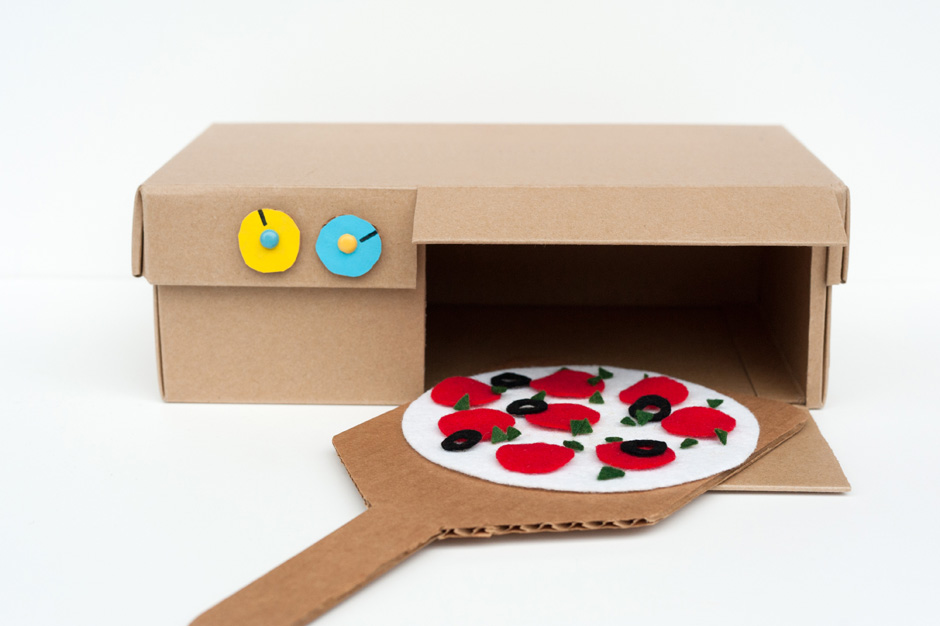
Cardboard Play Kitchens
Cardboard play kitchens are a fantastic way to spark creativity in children. They can craft their own kitchen and let their imagination run wild. With just a few materials, children can create a space that looks and feels like a real kitchen. It’s a fun and educational project that keeps them engaged for hours.
Building The Kitchen Frame
Start with a sturdy cardboard box for the kitchen base. Choose a box large enough for your child to interact with. Cut out doors for the oven and cabinets. Use tape to secure the edges and reinforce the structure. Make sure the frame is stable and can stand on its own.
Next, add shelves inside the cabinets. Cut smaller pieces of cardboard and attach them with glue or tape. This will create storage spaces for kitchen items. Paint the entire frame to give it a finished look. Let it dry completely before moving on.
Crafting Miniature Appliances
Make a stove using bottle caps for burners. Paint the caps black and glue them on the top surface. Create knobs from smaller caps or buttons and attach them below the burners. For the oven, draw a window on the door and cut it out. Use plastic wrap as the oven glass.
Build a sink using a small plastic container. Cut a hole in the countertop and insert the container. Use a bottle cap for the faucet and attach it with glue. Add a cardboard backsplash to complete the look. Paint the appliances to match the kitchen theme.
These simple steps can transform cardboard into a playful kitchen. Children will enjoy making and playing with their handmade kitchen. It is a rewarding and creative experience for them.
Cardboard Castles
Creating a cardboard castle is a fun and creative way to engage kids. They can unleash their imagination while learning about history and architecture. Cardboard castles can be as simple or as detailed as you want. Let’s dive into some exciting ideas for your cardboard castle project.
Designing Castle Walls
Start by planning the walls of your castle. Use sturdy cardboard pieces to ensure durability. Cut the cardboard into rectangular pieces for the walls. Use a ruler and pencil to draw the outlines. This helps achieve straight edges and a neat look.
Next, cut out small squares at the top of each piece. This will create the classic castle wall look. Paint the walls in grey or stone colors for a more authentic feel. You can also add details like bricks using a black marker.
Adding Towers And Drawbridges
Towers add a majestic touch to your cardboard castle. Use cylindrical cardboard tubes, like those from paper towels, to create towers. Cut the tubes to the desired height. Attach them to the corners of the walls using glue or tape.
For the drawbridge, cut a rectangular piece of cardboard. Attach it to the front wall of the castle using string or yarn. This allows the drawbridge to move up and down. Paint the drawbridge brown and add details like wood grain for a realistic touch.
Remember to involve your kids in the process. Let them paint and decorate the castle. This not only makes the project more fun but also helps develop their creativity and motor skills.
Cardboard Robots
Cardboard robots are a fantastic DIY project. They are fun and educational. Kids and adults alike enjoy making them. With just a few materials, you can create a unique robot. Cardboard is easy to cut and shape. Plus, it is eco-friendly. Let’s dive into some creative ideas for making cardboard robots.
Making A Basic Robot
Start with a simple design. Gather some cardboard boxes. You will need scissors or a craft knife. Use markers or paint to add details.
First, cut out a rectangular piece for the body. Then, cut smaller pieces for the head and limbs. Attach these pieces using glue or tape. Make sure they are secure.
Add facial features to the head. Draw eyes, a nose, and a mouth. You can also add buttons or stickers. These will give your robot personality.
Adding Movable Parts
Movable parts make your robot more interactive. You can create joints with brads or paper fasteners. These allow the arms and legs to move.
Punch holes where you want the joints. Insert the brads and spread their prongs. Now, the limbs can rotate and bend.
For extra fun, add wheels to the base. Cut small circles from cardboard. Attach them to the bottom of the robot. Now, your robot can roll around.
Decorate your robot with more details. Use colored paper, stickers, or paint. Let your imagination run wild.
Cardboard Mazes And Puzzles
Cardboard Mazes and Puzzles are great for kids. They spark creativity and enhance problem-solving skills. You can make them at home using simple materials. These fun projects are also excellent for rainy days. Let’s dive into two exciting ideas: creating a maze game and designing puzzle pieces.
Creating A Maze Game
Making a cardboard maze is easy and fun. You can use an old cardboard box, a marker, and some glue.
- First, draw a maze layout on the cardboard.
- Next, cut out walls from extra cardboard and glue them on the lines.
- Leave spaces for the start and finish points.
To make it more fun, add obstacles and dead ends. Use small balls or marbles to navigate through the maze. This activity keeps kids engaged and helps develop their motor skills.
Designing Puzzle Pieces
Cardboard puzzles can be both educational and entertaining. You can create puzzles from old boxes or cereal cartons.
- First, draw a picture on the cardboard. This could be a simple shape or a more detailed image.
- Next, cut the cardboard into pieces. Make sure the pieces are different shapes and sizes.
Mix the pieces and try to put them back together. For younger kids, use fewer and larger pieces. Older kids can enjoy more complex puzzles with smaller, intricate pieces. This helps improve their cognitive skills and hand-eye coordination.
Both of these DIY cardboard toy ideas are easy to make and provide hours of fun. They are also a great way to recycle old cardboard, making them eco-friendly.
Cardboard Animals
Creating cardboard animals can be a fun and educational activity for kids. It provides a wonderful opportunity to engage their creativity. Using simple materials like cardboard, paint, and markers, kids can bring their favorite animals to life. Here are some easy and engaging ideas to get started.
Simple Animal Shapes
Start with basic shapes to create your cardboard animals. Cut out circles, ovals, and triangles. These shapes can be turned into various animals. For example, a circle can be a cat’s head, while triangles make perfect ears.
Here are some simple ideas:
- Cat: Circle head, oval body, triangle ears
- Dog: Oval head, rectangle body, triangle ears
- Fish: Oval body, triangle fins
- Bird: Circle head, oval body, triangle beak
Painting And Decorating Animals
Once you have your shapes cut out, it’s time to paint and decorate your animals. Use acrylic paint for bright, bold colors. Markers can add details like eyes, noses, and whiskers. You can also use materials like glitter, googly eyes, and fabric scraps to add texture and personality.
Consider these decoration ideas:
- Cat: Paint it black, add green eyes, and draw whiskers.
- Dog: Paint it brown, add floppy ears, and draw a nose.
- Fish: Use bright colors, add scales with marker, and glue on fins.
- Bird: Paint it blue, add feathers with marker, and draw a beak.
Encourage kids to think creatively. Mixing colors and experimenting with different materials can lead to unique and delightful results.
Cardboard Musical Instruments
Creating musical instruments from cardboard is not only fun but also educational. Kids love making and playing with these simple, eco-friendly toys. Let’s dive into making some cardboard musical instruments.
Crafting A Cardboard Guitar
Materials needed:
- Cardboard
- Rubber bands
- Scissors
- Glue
- Markers or paint
Steps:
- Draw the shape of a guitar on the cardboard.
- Cut out the guitar shape using scissors.
- Make a hole in the center for the sound hole.
- Glue a long strip of cardboard for the neck.
- Paint and decorate your guitar as you like.
- Stretch rubber bands over the sound hole to create strings.
Your cardboard guitar is now ready to play. Strum the rubber bands to make music!
Making A Cardboard Drum
Materials needed:
- Cardboard tube (like a paper towel roll)
- Balloon
- Rubber bands
- Markers or paint
Steps:
- Cut the end off a balloon.
- Stretch the balloon over one end of the cardboard tube.
- Secure the balloon with a rubber band.
- Decorate the tube with markers or paint.
Tap on the balloon surface to play your drum. Experiment with different rhythms and sounds.
Credit: madebyjoel.com
Cardboard Space Crafts
Cardboard space crafts are a fun and creative way to engage children in imaginative play. These crafts not only entertain but also teach kids about space and engineering. Using simple materials like cardboard, you can create incredible space-themed toys. Let’s explore two exciting projects: building a rocket ship and creating a space helmet.
Building A Rocket Ship
Start by gathering a large cardboard box. Cut out a door for easy access. Use smaller boxes to create the rocket’s nose and fins. Secure them with glue or tape. Paint the entire structure with bright colors. Add details like windows and control panels. Use markers or stickers for this. Let your kids personalize their rocket with their own designs.
Creating A Space Helmet
Find a medium-sized cardboard box that fits your child’s head. Cut out a large hole for the face. Cut smaller holes for ventilation. Cover the box with aluminum foil to give it a metallic look. Use markers to draw buttons and gadgets on the helmet. Add a chin strap using a piece of elastic. This will ensure the helmet stays in place during playtime.
Conclusion And Tips
Creating DIY cardboard toys is a fun way to engage children. It fosters creativity and helps develop fine motor skills. Plus, it’s an excellent way to recycle materials. Below are some important tips to ensure a safe and enjoyable crafting experience.
Safety Tips For Kids
- Always supervise children while they use scissors or other sharp tools.
- Use non-toxic glue and paints.
- Ensure the cardboard edges are smooth to avoid cuts.
- Provide appropriate safety gear, like gloves, if needed.
- Keep small parts away from toddlers to prevent choking hazards.
Encouraging Creativity
Encouraging creativity in children is essential. It helps in their overall development. Here are some ways to boost their creative thinking.
- Let kids choose their own designs and colors.
- Provide a variety of materials like stickers, markers, and fabric scraps.
- Encourage storytelling. Ask them to create a story around their toy.
- Display their creations at home to boost their confidence.
- Set up playdates for collaborative crafting sessions.
Remember, the goal is to have fun and learn. Happy crafting!

Credit: www.theempowerededucatoronline.com
Conclusion
Creating DIY cardboard toys offers fun and creativity for the whole family. These projects are easy, affordable, and eco-friendly. You can make a variety of toys with just a few materials. Kids will enjoy building and playing with their own creations.
Plus, it’s a great way to spend quality time together. Try out different ideas and see what you can create. The possibilities are endless with a bit of imagination. So gather some cardboard, grab your scissors, and start crafting today.
Enjoy the process and the smiles it brings.
