14 DIY Sensory Bottles Recipes: Fun and Easy Craft Ideas
Sensory bottles are fun and educational for kids. They can calm and engage children.
Creating sensory bottles at home is easy and rewarding. These bottles are great tools for sensory play, helping kids explore their senses and emotions. They can be used to develop focus, relaxation, and creativity. With a few simple materials, you can create different types of sensory bottles that captivate and soothe.
From glittery swirls to floating beads, each bottle offers a unique experience. Ready to get creative? Let’s dive into 14 DIY sensory bottle recipes that you can make with your kids. These bottles are not only fun to make but also provide endless hours of entertainment and learning.

Credit: preschoolinspirations.com
Introduction To Sensory Bottles
Sensory bottles are a simple yet effective tool for children. These bottles can help calm anxious minds and stimulate sensory play. They are easy to make at home with a few basic materials. In this post, we will explore 14 DIY sensory bottle recipes. These activities are both fun and educational. Let’s dive into the world of sensory bottles and their benefits.
Benefits Of Sensory Bottles
There are several benefits to using sensory bottles. Here are some key advantages:
- Calming Effect: Sensory bottles can help children relax and focus.
- Fine Motor Skills: Shaking, turning, and manipulating the bottles can improve dexterity.
- Visual Stimulation: Watching the contents move can be mesmerizing and soothing.
- Emotional Regulation: They can help manage feelings of stress or frustration.
- Creativity: Making these bottles encourages creative thinking.
Materials Needed
To make your own sensory bottles, you will need the following materials:
| Material | Purpose |
|---|---|
| Clear Plastic Bottles | Base for sensory bottles |
| Water | Main filler |
| Glitter | Visual appeal |
| Food Coloring | Adds color |
| Small Toys or Beads | Interactive elements |
| Glue | Thickens the mixture |
| Vegetable Oil | Creates interesting flow |
With these materials, you can create endless combinations of sensory bottles. Each recipe will offer a unique sensory experience.
Calming Glitter Bottles
Calming glitter bottles are a fantastic DIY project for kids and adults. They are mesmerizing, fun to create, and can help reduce stress and anxiety. These sensory bottles are perfect for a calming activity. Let’s dive into how to make your own calming glitter bottles.
Supplies List
- Clear plastic bottle
- Warm water
- Clear glue
- Fine glitter
- Food coloring (optional)
- Glycerin (optional)
- Super glue or hot glue
Step-by-step Instructions
1. Clean the plastic bottle and remove any labels.
2. Fill the bottle with warm water, leaving some space at the top.
3. Add clear glue to the water. This will make the glitter float.
4. Add a few drops of food coloring, if desired.
5. Pour in the fine glitter. The more glitter, the better the effect.
6. Add a few drops of glycerin. This slows the movement of the glitter.
7. Close the bottle tightly. Use super glue or hot glue to seal it.
8. Shake the bottle to mix the ingredients. Watch the glitter swirl and settle.
9. Enjoy the calming effect of your new glitter bottle!
Rainbow Sensory Bottles
Sensory bottles are a wonderful way to engage children’s senses. They are not just fun but also educational. One of the most captivating types is Rainbow Sensory Bottles. These bottles can mesmerize kids with their vibrant layers of colors.
Creating Color Layers
To create a rainbow sensory bottle, you need a few materials:
- Clear plastic bottle
- Water
- Food coloring in rainbow colors
- Baby oil or clear glue
- Glitter (optional)
First, fill the bottle halfway with water. Add a few drops of red food coloring. Gently swirl to mix. Pour a layer of baby oil or clear glue on top. The oil and water will stay separate, creating a distinct layer.
Next, add orange food coloring to the water layer. Continue adding layers of oil and water, changing the food coloring each time. Repeat until you have all the colors of the rainbow.
Tips For Success
- Seal the bottle: Use a hot glue gun to seal the cap. This prevents spills and messes.
- Shake gently: Shaking too hard can mix the colors. Gentle shaking keeps the layers intact.
- Use clear materials: Ensure the bottle and glue are clear. This keeps the colors bright and visible.
- Experiment with glitter: Adding glitter can make the bottle sparkle. Use it sparingly to avoid clumping.
Creating a rainbow sensory bottle is a fun, engaging activity. It not only entertains but also stimulates children’s senses.
Ocean-themed Bottles
Welcome to the captivating world of DIY sensory bottles! Let’s dive into the ocean-themed bottles. These bottles mimic the serene beauty of the ocean. They are perfect for calming moments and sensory exploration. Great for kids and adults alike. Ready to embark on this creative journey? Let’s get started!
Required Materials
- Clear plastic bottles with lids
- Blue food coloring
- Water
- Baby oil or clear corn syrup
- Small sea-themed items (shells, plastic fish, glitter)
- Hot glue gun
Assembly Guide
Start by filling the bottle halfway with water. Add a few drops of blue food coloring. Mix until you get the desired shade of blue. Next, fill the rest of the bottle with baby oil or clear corn syrup. This creates a soothing wave effect.
Now, drop in the sea-themed items. Add shells, plastic fish, and a bit of glitter. These elements bring the ocean to life. Secure the lid tightly with the hot glue gun. This ensures the bottle won’t leak.
Shake the bottle gently to see the waves form. Watch the sea creatures move. Enjoy the calming effect of your ocean-themed sensory bottle. It’s a small piece of the ocean, right in your hands!
Nature-inspired Bottles
Sensory bottles are a wonderful way to engage children with nature. They bring the beauty of the outdoors inside, providing a calming and educational experience. Nature-inspired sensory bottles are especially popular. They use elements from the environment to create a connection with the natural world. These bottles can be a great tool for kids to explore textures, colors, and sounds in a contained space.
Natural Elements To Include
Start by gathering materials from your backyard or local park. Leaves are a must. They come in various shapes and colors. Add small flowers for a pop of color. Pinecones offer an interesting texture. Small stones or pebbles can add weight and sound. You can also use sand or dirt for a natural base. Twigs and small branches bring a woodland feel. Don’t forget water. It can enhance the visual effect of your bottle.
How To Assemble
First, clean and dry your bottle. Make sure it’s clear. Add a layer of sand or dirt at the bottom. This will be your base. Then, start adding your natural elements. Place the larger items first. This includes stones, pinecones, and twigs. Next, add the smaller items like leaves and flowers. Pour water into the bottle. Fill it to the top. Seal the bottle tightly. You can use glue to secure the lid. Shake gently to see the elements move. Your nature-inspired sensory bottle is now ready.
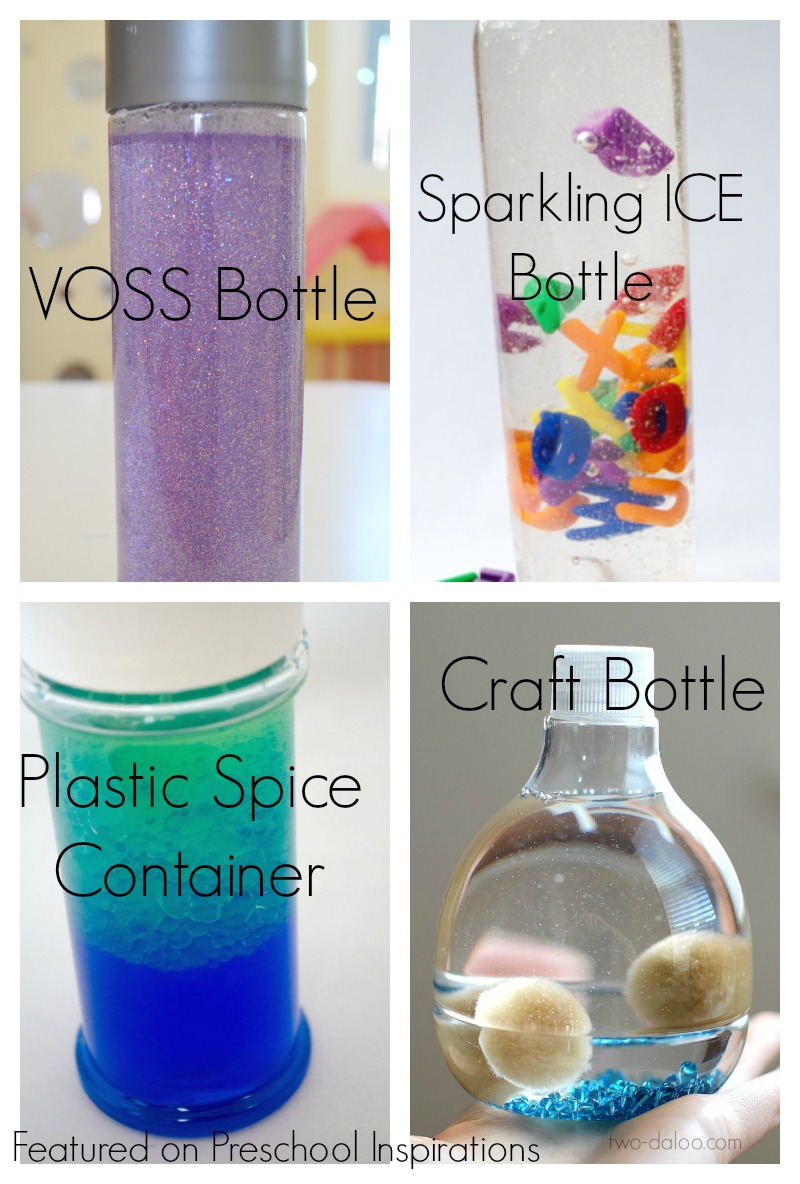
Credit: preschoolinspirations.com
Galaxy Sensory Bottles
Galaxy Sensory Bottles are a magical way to engage children. They create a sense of wonder. These bottles mimic the beauty of outer space. The swirling colors and glitter captivate the imagination. They are easy to make and perfect for sensory play.
Creating The Galaxy Effect
To create the galaxy effect, gather a clear plastic bottle. Fill it three-quarters full with water. Add a few drops of blue and purple food coloring. Mix well to achieve the desired shade. Next, add a generous amount of glitter. Use both fine and chunky glitter for variety. Seal the bottle tightly and shake it to mix.
Additional Enhancements
Enhance your galaxy bottle by adding small star confetti. This makes it look more like outer space. You can also add glow-in-the-dark stars. These will light up in the dark, adding an extra element of magic. Another option is to add a few drops of baby oil. This will create a slower, more mesmerizing swirl.
Slow-fall Bottles
Slow-Fall Bottles are a great way to create mesmerizing sensory experiences. These bottles are designed to capture and hold your child’s attention. They work by using liquids with different densities, creating a slow-falling effect. The contents inside slowly drift and swirl, making them fascinating to watch. These DIY sensory bottles can help with relaxation, focus, and even emotional regulation.
Choosing The Right Liquids
The type of liquid used is crucial for slow-fall bottles. Water and baby oil are excellent choices. Water is easily available and safe. Baby oil is thicker, making items fall slower. You can also use glycerin. It is thicker than water but thinner than baby oil. This allows for a moderate fall. Experiment with different liquids to see which works best.
Assembly Instructions
First, gather your materials. You will need an empty bottle, water, baby oil, or glycerin. Add small items like glitter, beads, or sequins. Fill the bottle halfway with water. Then, fill the rest with baby oil or glycerin. Leave a small gap at the top. This prevents spills. Seal the bottle tightly. You can use glue for added security. Shake the bottle gently to mix the contents. Watch as the items inside slowly fall. Enjoy the calming effect!
Glow-in-the-dark Bottles
Glow-in-the-dark sensory bottles bring magic to any room. Kids love watching the glowing objects float and swirl. These bottles can be calming, educational, and fun. Creating glow-in-the-dark bottles at home is easy and rewarding.
Materials Needed
- Clear plastic bottles with lids
- Glow-in-the-dark paint
- Warm water
- Clear glue
- Glitter (optional)
- Small glow-in-the-dark objects (stars, beads)
- Superglue (to seal the lids)
Crafting Steps
Start by cleaning the plastic bottles. Remove any labels and ensure the bottles are dry. Pour clear glue into each bottle. About one-quarter of the bottle should be filled with glue. This helps the objects inside float slowly.
Add warm water to the bottle, filling it almost to the top. Leave some space to add the other materials. Add a few drops of glow-in-the-dark paint. You can mix different colors if you like. Shake the bottle well to mix the paint and water.
Drop in the small glow-in-the-dark objects. Be creative. You can add stars, beads, or any small items that glow. Add glitter if you want extra sparkle. Seal the bottle with the lid. Use superglue to secure the lid and prevent leaks.
Place the bottle under a bright light to “charge” the glow-in-the-dark materials. Then turn off the lights and watch the magic happen. The bottle will glow beautifully in the dark. Enjoy the calming and mesmerizing effect of your DIY creation.
Holiday-themed Bottles
Are you looking for ways to make the holidays even more magical? Try creating holiday-themed sensory bottles! These DIY bottles are perfect for adding a festive touch to your home. They are also great for keeping kids entertained and engaged. Below, you will find some fantastic ideas and tips to create your own holiday-themed sensory bottles.
Seasonal Ideas
The holidays bring various themes to explore. Here are some seasonal ideas for your sensory bottles:
- Christmas: Use red, green, and white glitter. Add small Christmas ornaments or bells.
- Halloween: Use orange and black glitter. Add small plastic spiders and bats.
- Thanksgiving: Use fall colors like orange, yellow, and brown. Add small plastic leaves and pumpkins.
- Winter: Use blue and white glitter. Add small snowflakes and tiny snowmen.
- Valentine’s Day: Use red and pink glitter. Add small heart confetti and tiny love notes.
Decorating Tips
Creating beautiful sensory bottles is easy with these decorating tips:
- Layer Your Materials: Start with a layer of glitter, then add small decorations. Repeat the layers for a stunning look.
- Seal the Lid: Use a glue gun to seal the lid. This prevents leaks and keeps the contents secure.
- Choose the Right Bottle: Use clear plastic bottles. They are lightweight and shatterproof, making them safe for kids.
- Add Liquid: Fill the bottle with water or a mix of water and clear glue. This helps the glitter and decorations move slowly.
- Label Your Bottles: Use festive stickers or labels to mark the bottles. This adds a special touch and helps identify the theme.
Creating holiday-themed sensory bottles can be a fun activity for the entire family. Use these ideas and tips to make your holidays even more special. Happy crafting!
Alphabet Sensory Bottles
Alphabet Sensory Bottles are a fun and educational DIY project. They are easy to make and offer many learning benefits. These bottles help children learn letters while engaging their senses. They are perfect for toddlers and preschoolers.
Educational Benefits
Alphabet Sensory Bottles offer many educational benefits. They help children recognize letters. They also improve fine motor skills. Children shake and turn the bottles, which strengthens their hands.
These bottles can also improve focus. Children can spend time looking at each letter. This helps them concentrate better. Alphabet Sensory Bottles can make learning letters exciting and fun.
Making The Bottles
To make Alphabet Sensory Bottles, gather clear plastic bottles. You will also need small alphabet letters. You can use plastic letters or letter beads.
Fill each bottle halfway with water. Then, add the alphabet letters. You can also add glitter or small beads for extra fun. Seal the bottles tightly to avoid spills.
Label each bottle with a different letter. This will help children identify each letter. You can make one bottle for each letter of the alphabet.
Shake the bottles to mix the letters. Now, your Alphabet Sensory Bottles are ready. Children can start exploring and learning letters in a fun way.
Animal-themed Bottles
Animal-themed sensory bottles are a fun and educational way to engage children. These bottles can help with sensory processing, focus, and relaxation. Kids love to watch the tiny creatures float around. Plus, they can be a great tool for learning about different animals.
Animal Figures To Use
Choose small plastic animal figures for your sensory bottles. Dinosaurs, sea creatures, and jungle animals work well. Make sure the figures are small enough to fit into the bottle opening. Avoid figures with sharp edges to ensure safety.
You can find these figures in toy stores or online. Look for sets that have a variety of animals. This will keep the sensory bottles interesting and educational. You can also use animal-themed beads or sequins for added texture.
Building The Bottles
Start with a clean, empty plastic bottle. Fill the bottle with water, but leave some space at the top. Add a few drops of food coloring to the water. This will make the bottle more visually appealing.
Next, place the animal figures into the bottle. You can also add glitter, beads, or small buttons. These items will add more sensory elements. Secure the bottle cap tightly. You may want to glue the cap to prevent spills.
Shake the bottle gently to mix the contents. The animals should float and move around. Your child can shake, roll, or turn the bottle. The movement will create different visual effects.
Magnetic Sensory Bottles
Magnetic sensory bottles are fun and educational. They engage children with bright colors and fascinating movements. These DIY bottles are perfect for curious minds. Let’s explore how to create them and enjoy interactive play.
Magnetic Materials
To create a magnetic sensory bottle, you need the right materials. Gather a clear plastic bottle, water, and a few drops of food coloring. Add glitter and magnetic items.
Here are some magnetic items you can use:
- Small metal paper clips
- Iron filings
- Magnetic beads
- Small metal screws or bolts
Fill the bottle halfway with water. Add a few drops of food coloring and glitter. Insert the magnetic items carefully.
Seal the bottle tightly. You can use glue to ensure it stays closed. Shake the bottle to mix the contents. Watch the magnets move!
Interactive Play Ideas
Magnetic sensory bottles offer many play possibilities. Here are some ideas:
- Magnet Wand: Use a magnet wand to move the items inside the bottle. Children will enjoy seeing how the objects react.
- Hide and Seek: Hide small magnetic items among non-magnetic ones. Let children find them using a magnet wand.
- Observation: Ask children to observe and describe what they see. This activity enhances their vocabulary and observation skills.
Encourage children to experiment. Let them discover new ways to play with the bottles. Magnetic sensory bottles are not just toys. They are educational tools that stimulate the mind.
Water Bead Sensory Bottles
Water Bead Sensory Bottles are a fantastic DIY project. They provide a soothing and engaging activity for both kids and adults. These bottles use colorful water beads that expand when soaked in water. They create a beautiful visual and tactile experience. Let’s dive into how you can make your own water bead sensory bottles!
Using Water Beads
Water beads are small, non-toxic, and made from a water-absorbing polymer. They start off tiny but grow when soaked in water. These beads are available in various colors and are perfect for sensory play.
- Purchase water beads from a craft store or online.
- Soak the beads in water for several hours. Follow the instructions on the package.
- Once hydrated, the beads will be squishy and round.
Crafting Instructions
Creating water bead sensory bottles is simple. Follow these easy steps to make your own:
- Gather your materials: clear plastic bottles, water beads, water, and any additional decorations (glitter, small toys).
- Fill the bottle halfway with water beads.
- Add water to the bottle, filling it almost to the top.
- If desired, add glitter or small toys for extra visual appeal.
- Seal the bottle tightly. Use hot glue or tape around the cap to prevent leaks.
Once completed, your sensory bottle is ready for play. Shake it, turn it, and watch the beads move and sparkle. These bottles are perfect for calming down, focusing, or just having fun!
Themed Sensory Bottles
Sensory bottles are a fun and engaging way to stimulate the senses. Themed sensory bottles add an extra layer of excitement and creativity. You can tailor them to match any interest or occasion. Let’s dive into making themed sensory bottles.
Choosing A Theme
Start by picking a theme. Think about your child’s interests. Popular themes include seasons, holidays, or favorite characters. You can also choose themes like ocean, space, or nature. Select a theme that will engage and excite.
Assembling The Bottle
Gather your materials. You will need a clear plastic bottle. Choose items that match your theme. For an ocean theme, use blue water beads, shells, and glitter. For a space theme, add stars, planets, and dark-colored glitter. Fill the bottle with a mix of water and clear glue. This creates a slow-moving effect. Add your themed items to the bottle. Secure the lid tightly. You can also use hot glue to seal the lid for extra safety. Shake the bottle gently to see the items move around. You now have a fun and engaging sensory bottle.
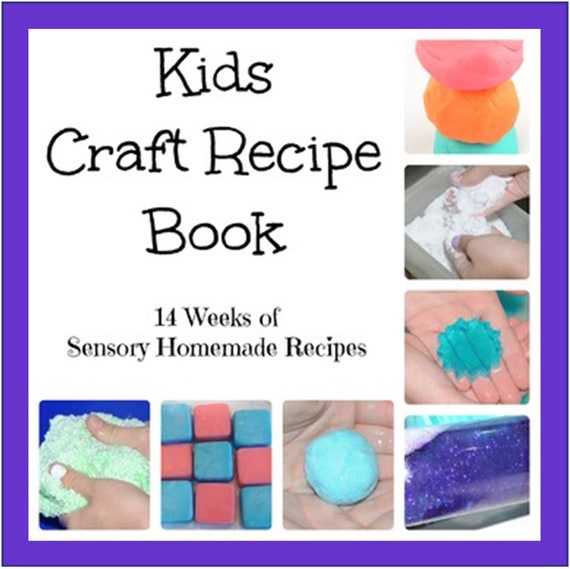
Credit: www.etsy.com
Conclusion
Creating sensory bottles at home is simple and fun. These DIY projects offer endless creativity. They help soothe and engage children. Each recipe brings unique benefits and joy. Families can enjoy making them together. Easy materials make the process hassle-free.
Try different designs and find favorites. Sensory bottles can enhance learning and playtime. They are perfect for any age. Start your DIY adventure today. Enjoy the calming effects and watch imaginations soar.